
[EN] Event form - practical guide
How to Use Event Forms Successfully
In the following tutorial, we show you practical examples of how to use event forms effectively in the eworx Marketing Suite.
Practical Example 1: Event Registration with Menu Selection and Accommodation
Scenario:
A company is organizing a two-day customer event with dinner. To prepare for the event, menu preferences and hotel accommodation requirements need to be collected in advance.
Implementation in the Event Form:
- Subscriber Fields
- First Name
- Last Name
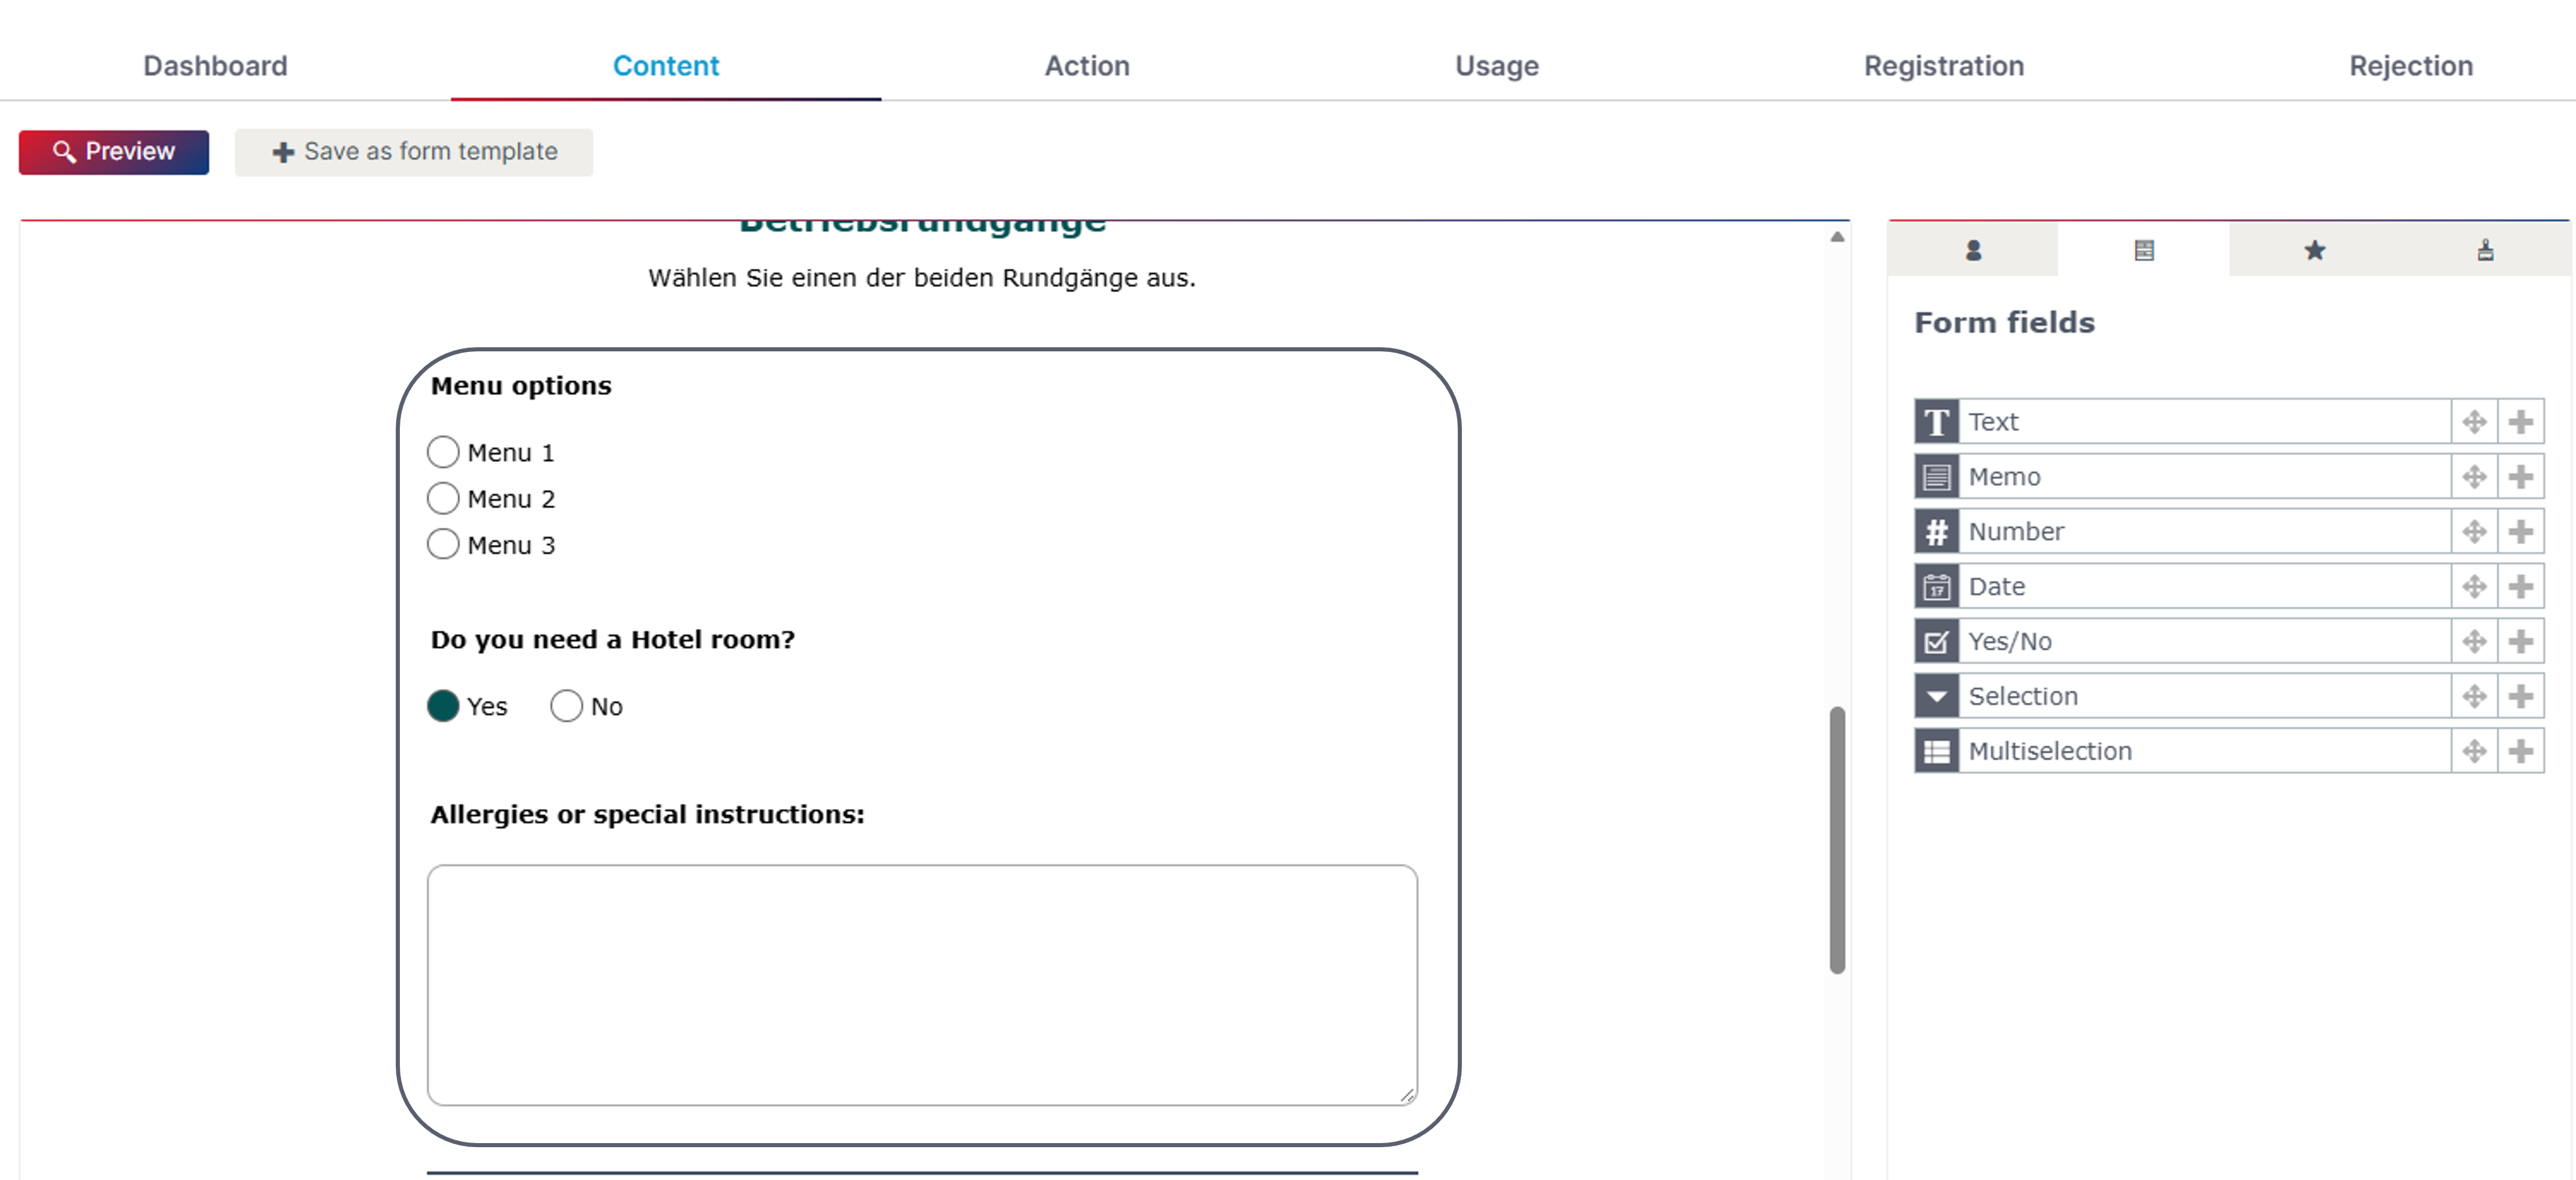
- Form Fields (Event-Specific Information)
- Selection field "Menu Selection" (Meat, Vegetarian, Vegan)
- Yes/No field "Do you need a hotel room?"
- Optional text or notes field "Food intolerances or special requests"
👉 Menu preferences and accommodation details are stored only for this event and can be exported after the event, for example, to share with the catering service or hotel.
Practical Example 2: Event with Limited Capacity and Waiting List
Scenario:
An in-person workshop has a maximum capacity of 25 participants. Due to expected high demand, a waiting list should be used automatically.
Implementation in the Event Form:
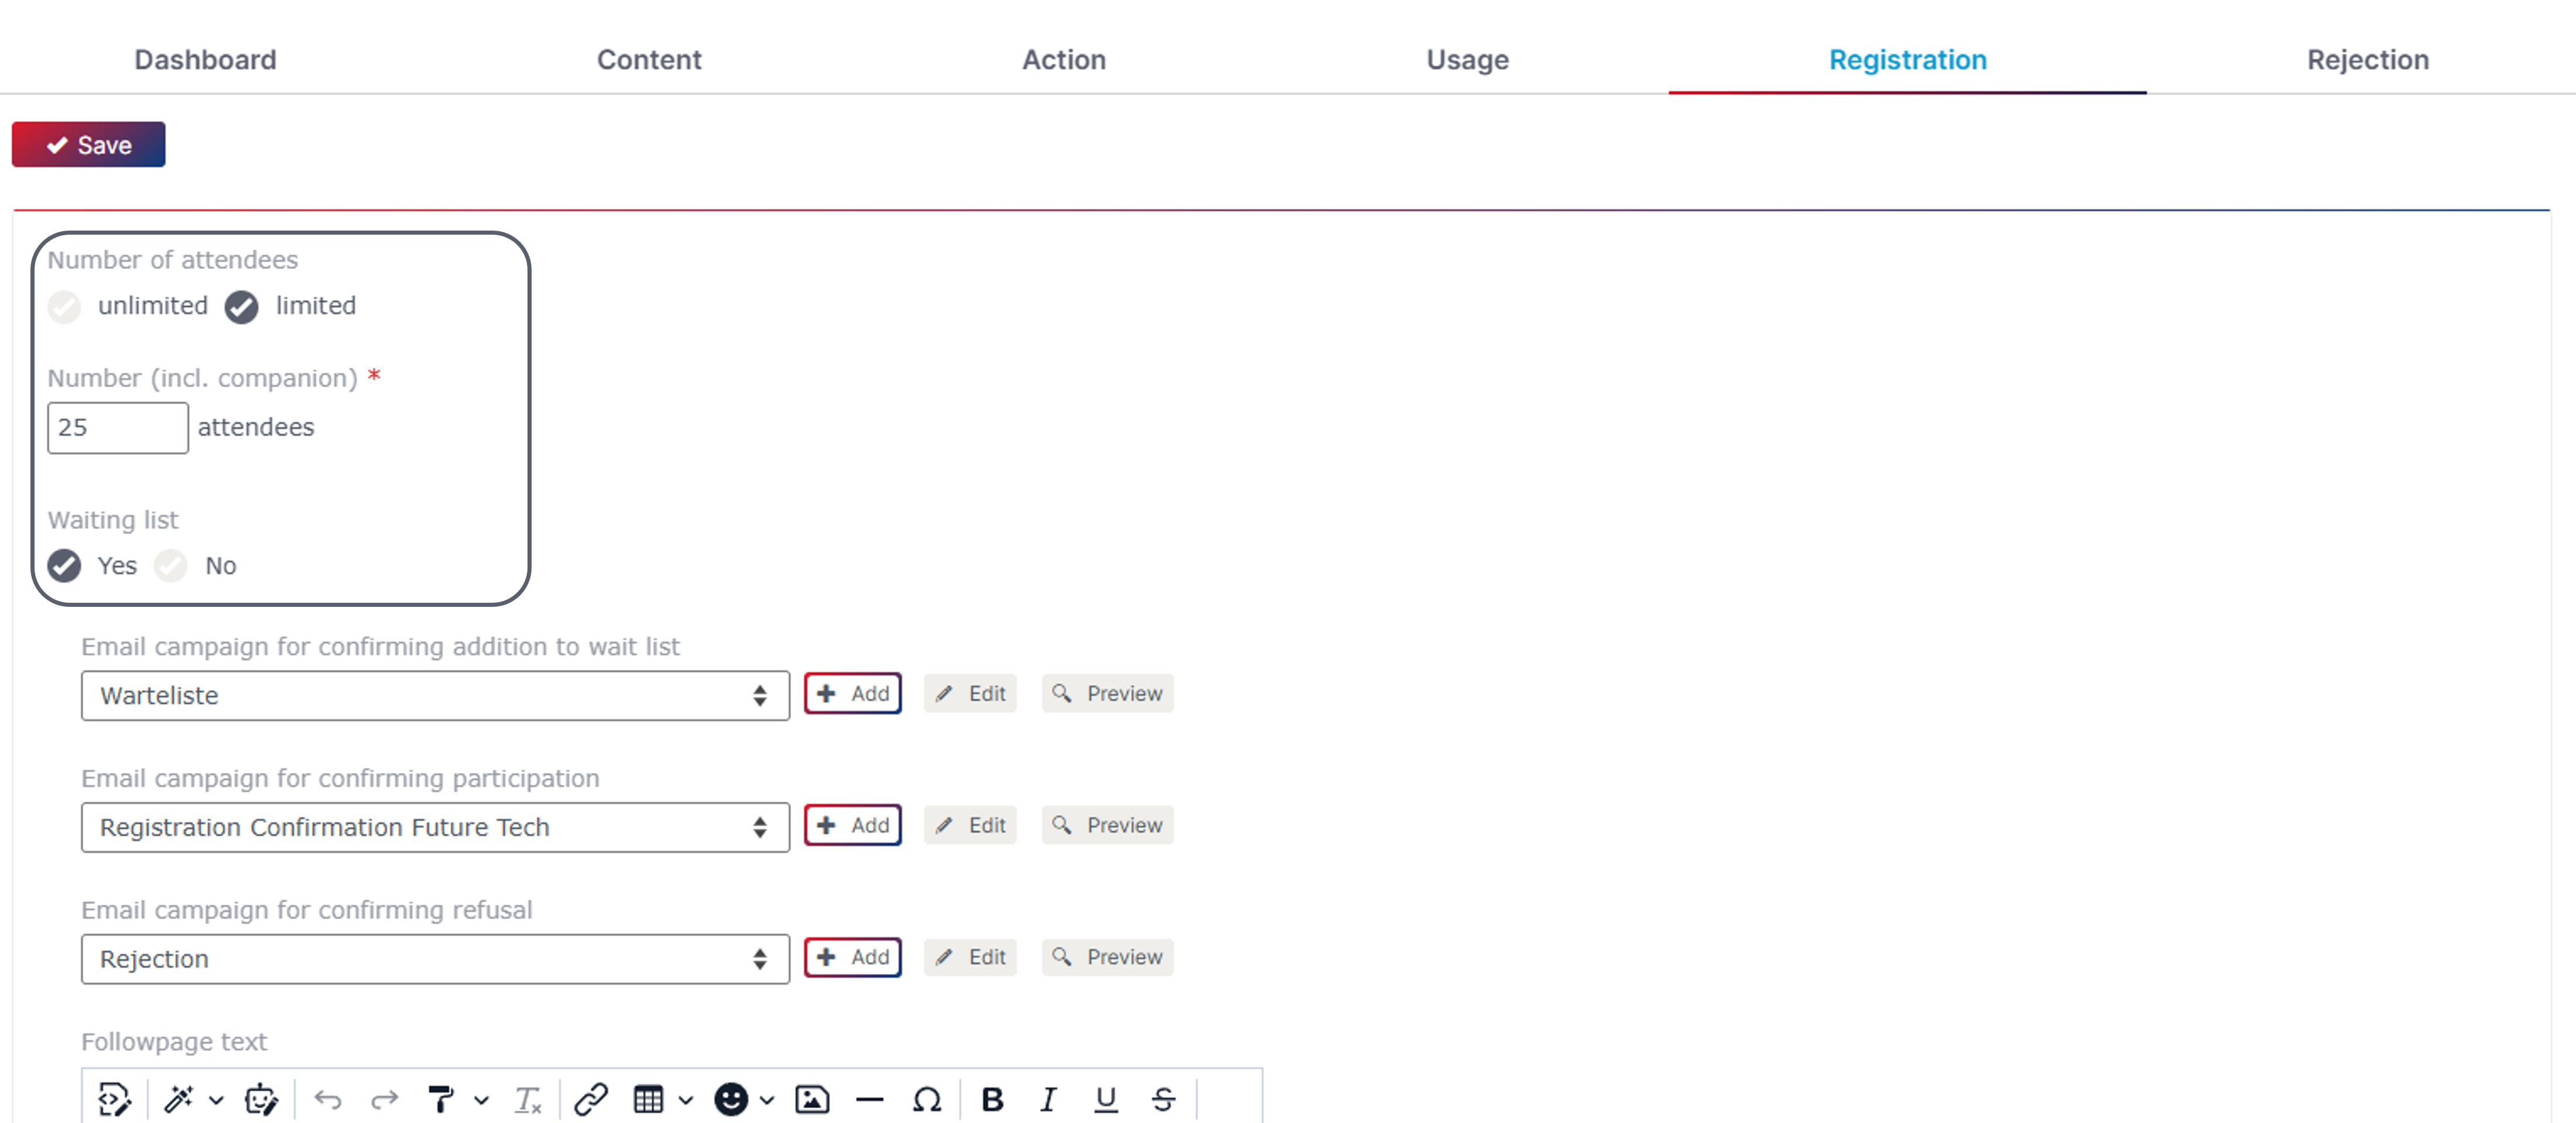
- Maximum number of participants: 25
- Waiting list: enabled
How It Works in Practice:
- The first 25 registrations are automatically assigned the status "Registered".
- Additional registrations are automatically placed on the waiting list.
- These subscribers receive an event-based campaign informing them of their waiting list status.
- When a spot becomes available, a participant can be manually moved from the waiting list to "Registered", including an automatic notification.
Practical Example 3: Automatic Registration Confirmation After Form Submission
Scenario:
After registering for an event, participants should immediately receive a confirmation email containing event details and their event ticket.
Implementation in the "Action" Tab:
- Select an event-based email campaign under "Campaign on Form Submission"
- Campaign content:
- Registration confirmation
- Event information
- Event ticket or URL to the Teams meeting
👉 The email is sent automatically when the form is submitted, regardless of whether the subscriber registers via a newsletter or the website.
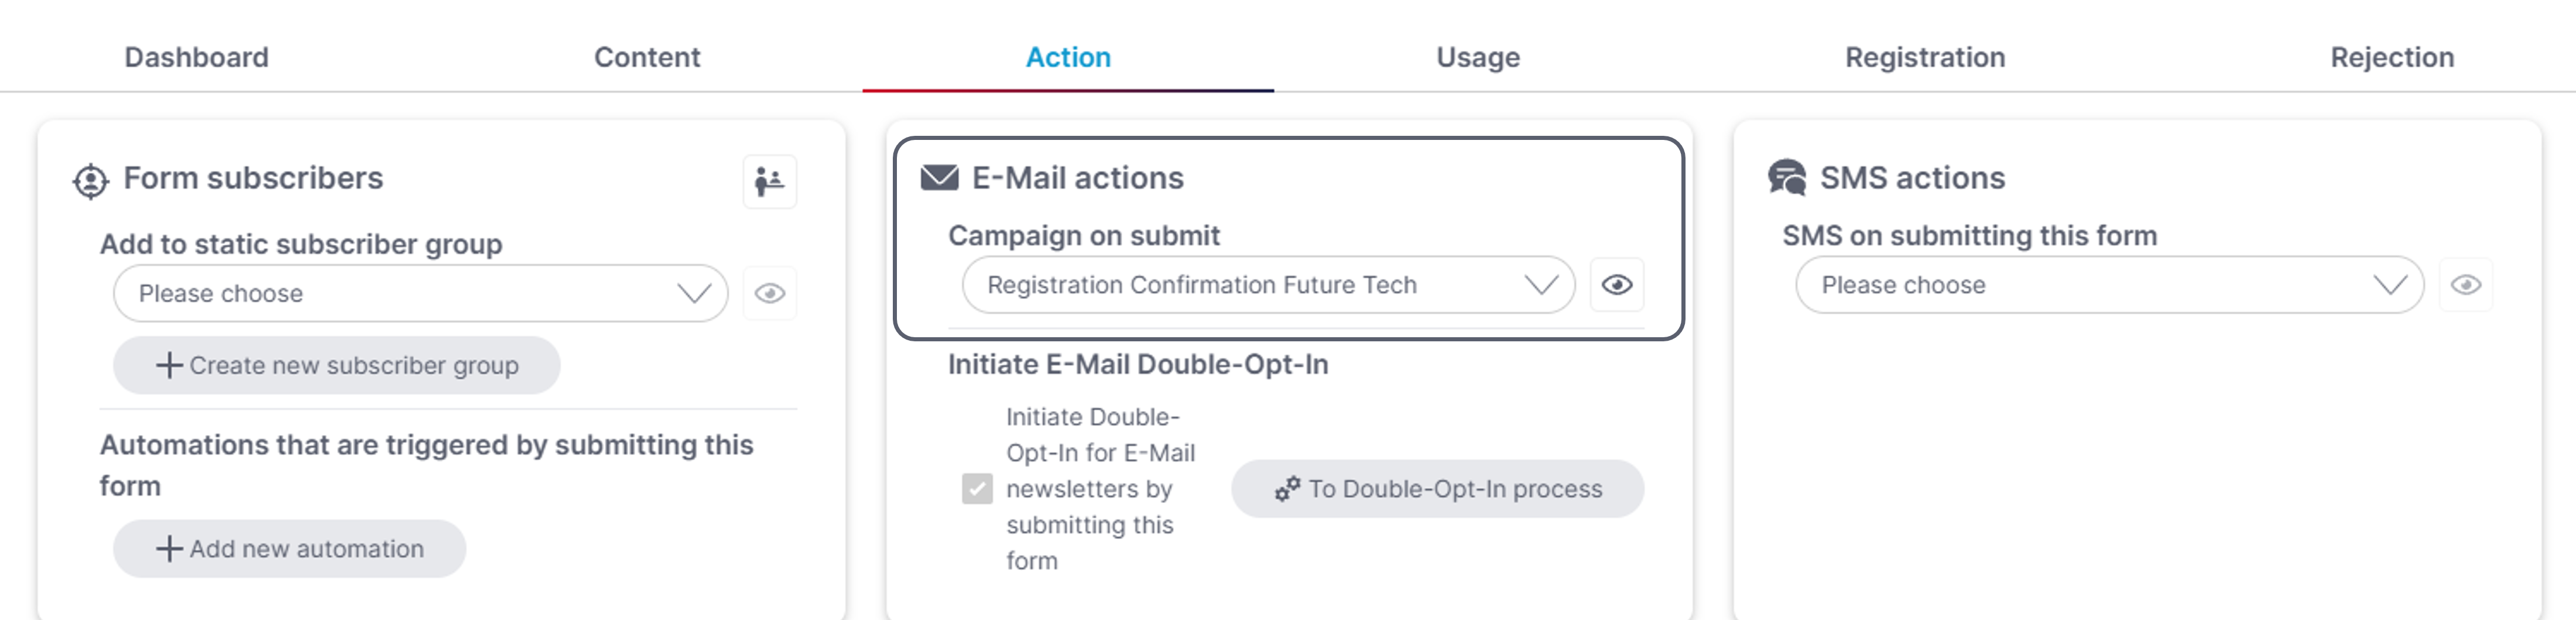
Important! This campaign must use the sending type "Event-Based Sending: Simple Trigger Emails" and have the status "Ready to Send" in order to be selectable here.
Practical Example 4: Registration with an Accompanying Person
Scenario:
Participants are allowed to bring an accompanying person to a customer event. The name of the accompanying person should be collected during the registration process.
Implementation in the Event Form:
- Allow accompanying persons
- Maximum number: 1
- Collect details of the accompanying person:
- Create a text field "Name of Companion"
The "Companion" field is added in the "Content" tab under "Extras", and its label can be customized.
👉 The accompanying person's details are saved directly with the registration and are available in the guest list export for further planning.
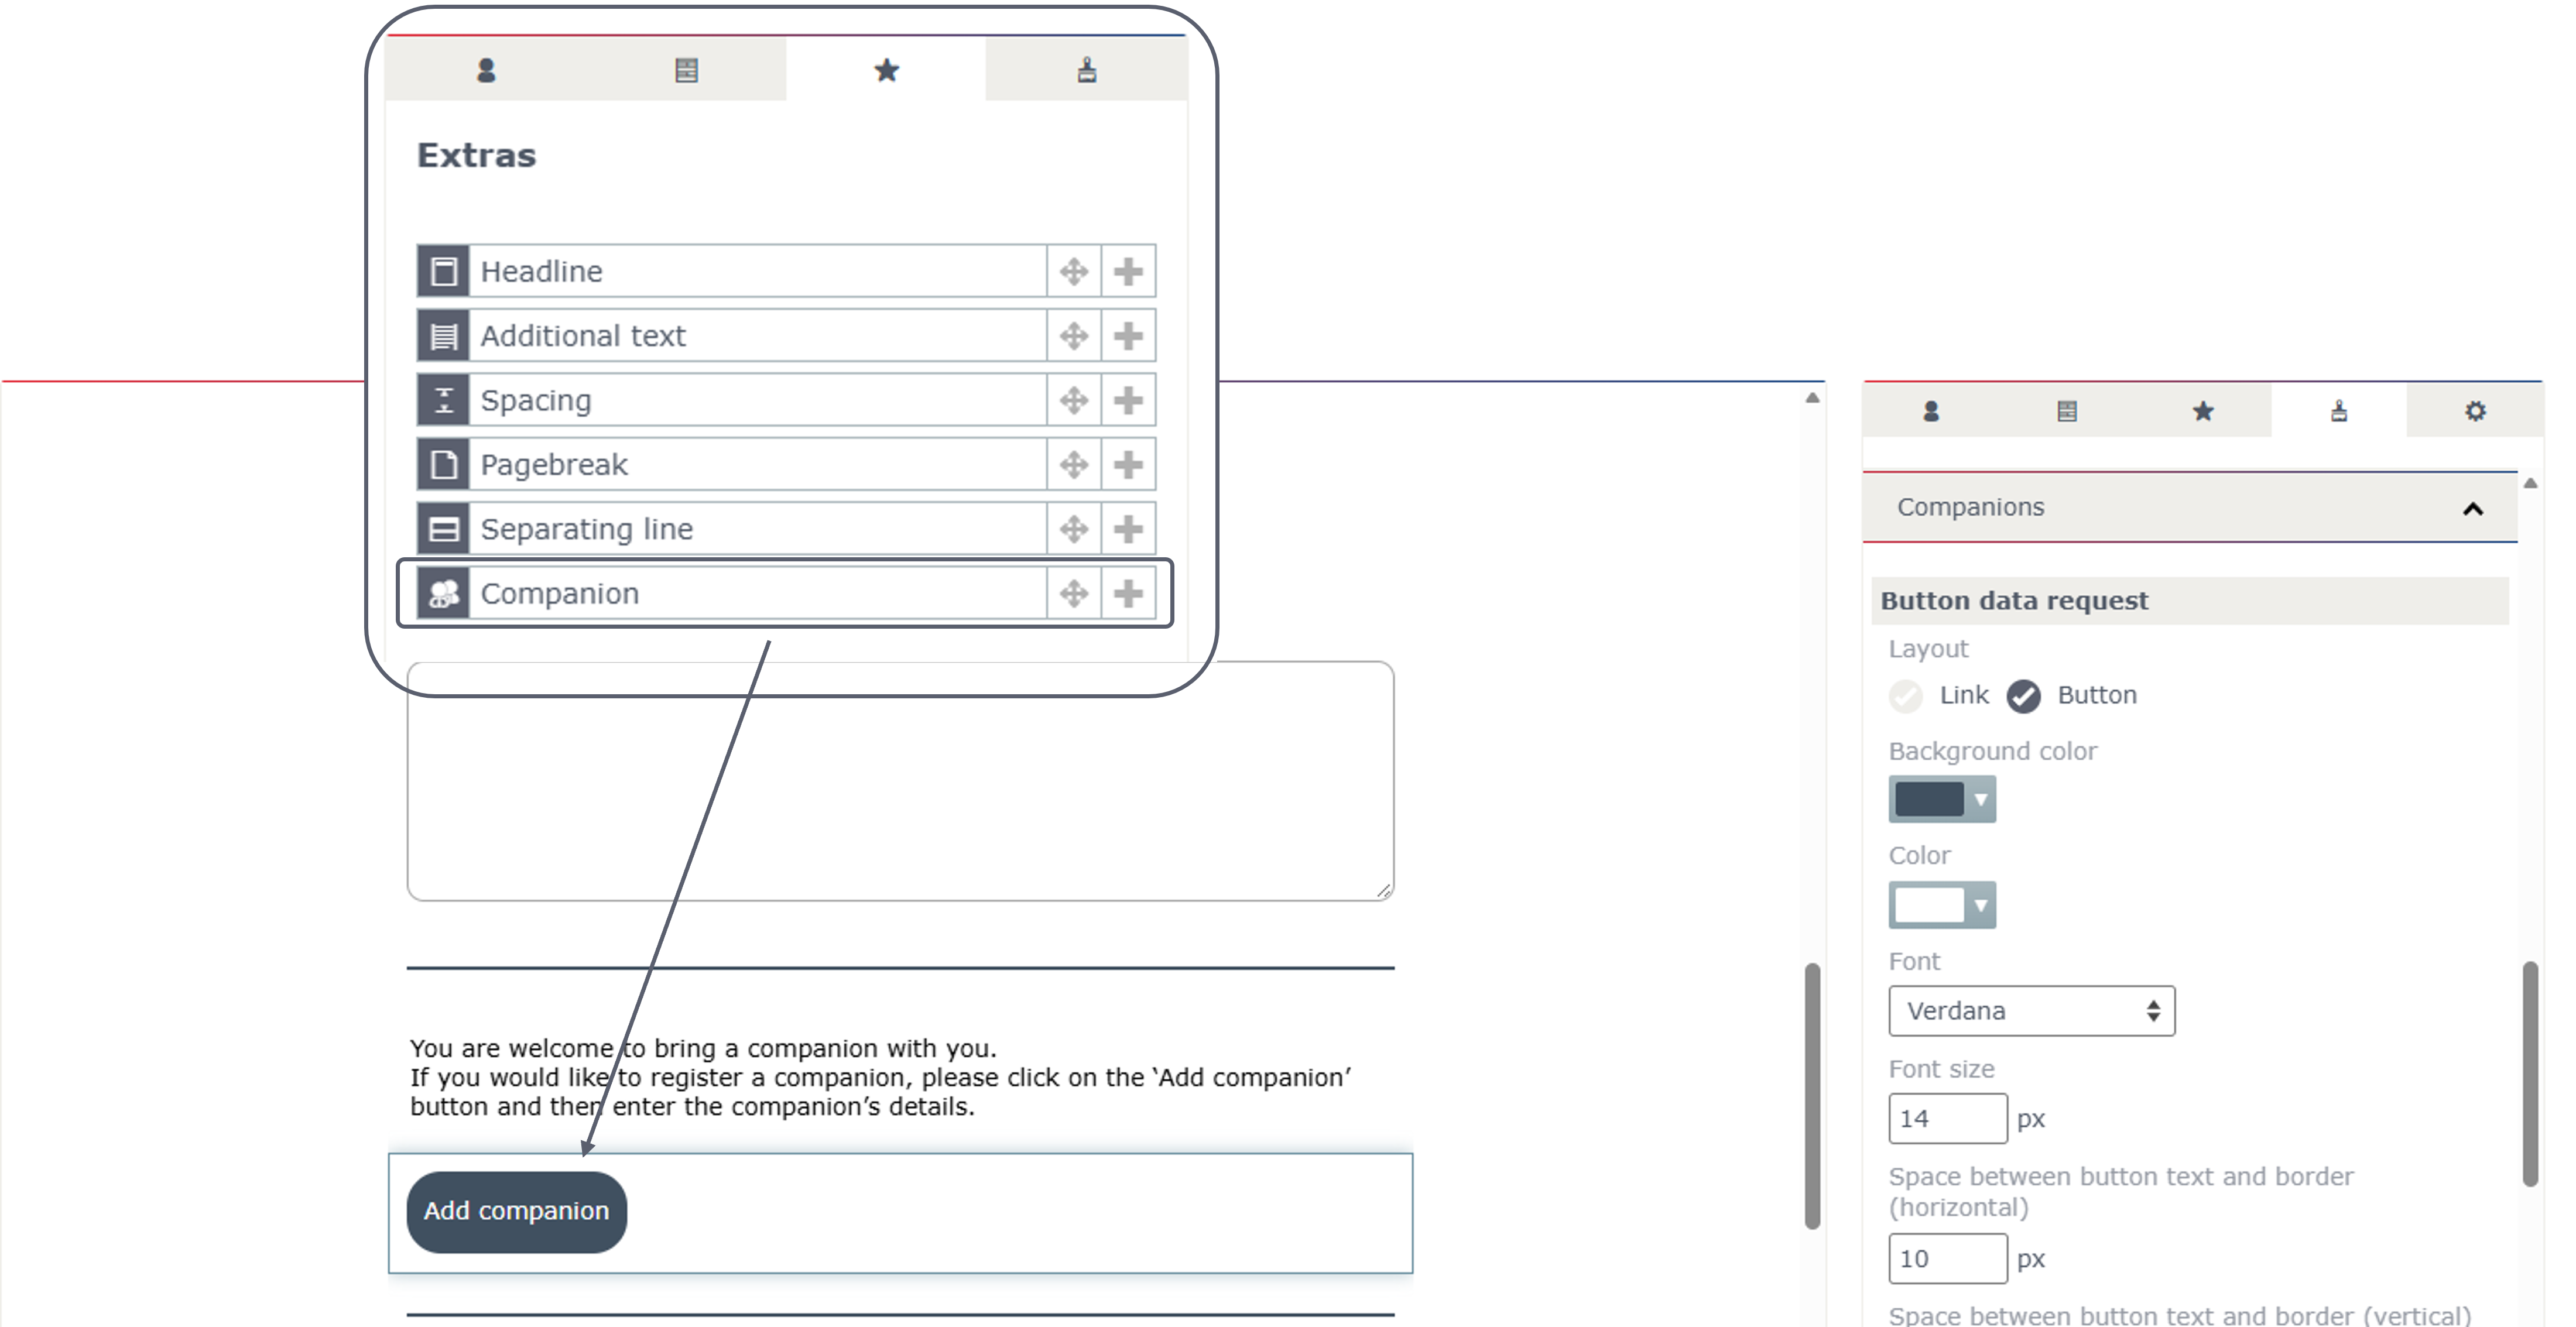
The "Companion" field can be formatted independently of other buttons and links in the content.
Updated about 3 hours ago