[EN] Landingpages
Efficient user guidance and effortless content creation
The landing page editor has been specially developed to make the creation and editing of landing pages even more intuitive, faster and more efficient. The extensive editing options and the characteristic eMS look & feel ensure clarity and allow you to design your pages more efficiently.
Why do I need landing pages?
The landing page editor in the eworx Marketing Suite not only increases flexibility in design, but also offers several options for use. Be inspired by our possible areas of application:
Redirect pages (success and error pages)
If a recipient registers for a form (competition, newsletter registration, …), it also makes sense for them to know whether their registration was successful or not. This can be done by redirecting to an eworx Marketing Suite landing page. Further information can be found in the following whitepaper .
Event page
It is also possible to link to a whitepaper (in campaigns or forms). This allows you to link to an attractively designed page with detailed information on the event in question, for example in email announcements for events.
Repeated provision of content
Landing pages allow you to provide general content or news articles. These can be easily linked in email campaigns or other channels, saving your recipients the hassle of downloading PDFs, for example, and the content can also be personalized if required.
How do I create a landing page in the eworx Marketing Suite?
If you access the landing pages module in the eworx Marketing Suite, you will see a list of your landing pages, sorted by status.
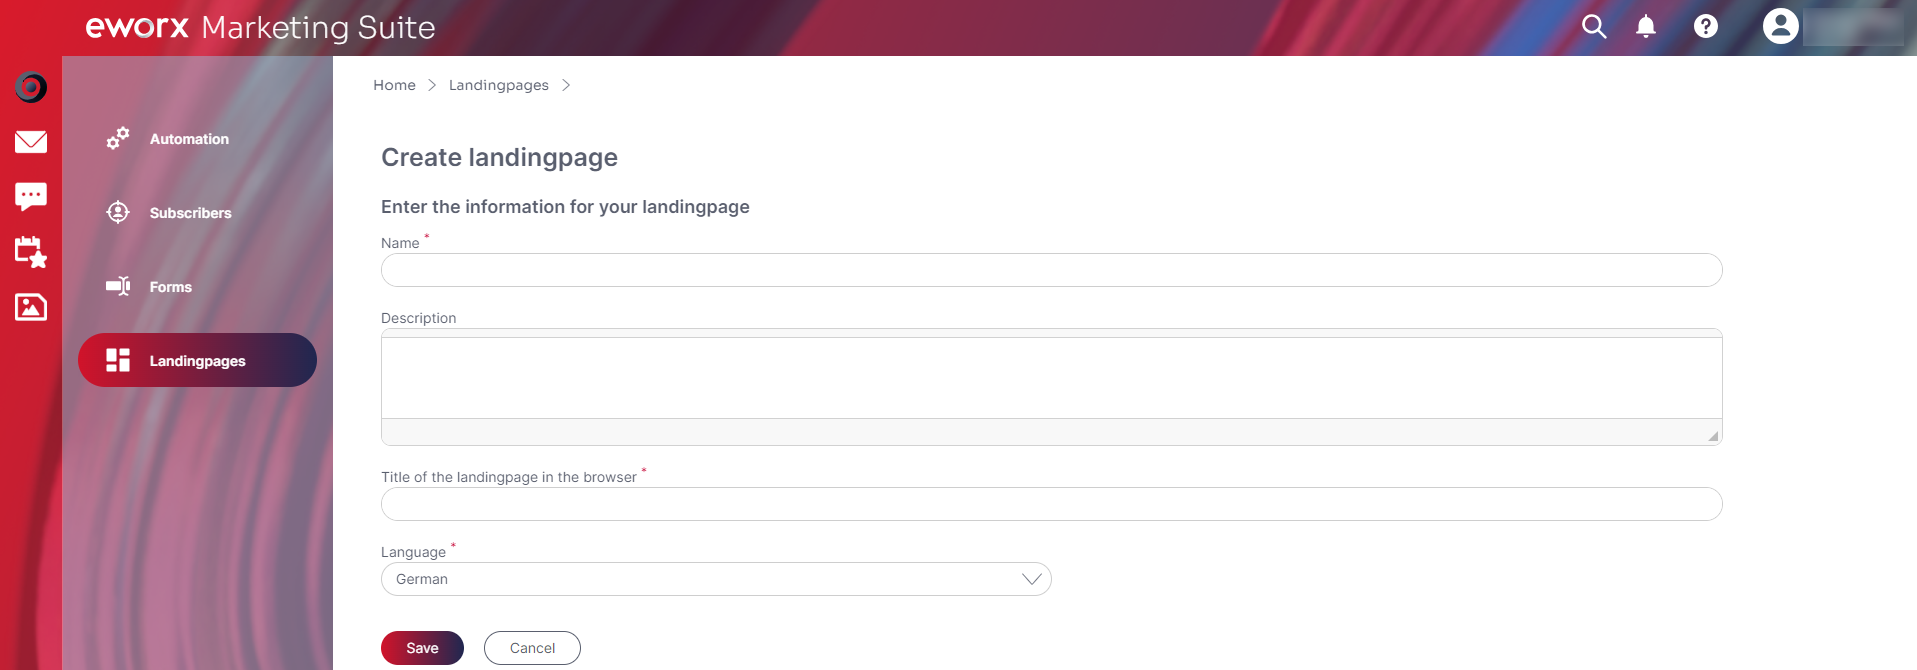
By clicking on the „Create new landing page“ button, you can create a new landing page in just a few steps. The first step is to define the „Name„. In the „Description“ field, you have the option of entering internal notes. The „Title of the landing page in the browser“ is the text that is displayed in the browser tab. Another mandatory field is the language. If several languages are available in the client, the desired language can be selected here using the drop-down menu.

Only after saving the additional tabs and selection options appear with which you can further edit the landing page.
What functions does the landing page editor offer?
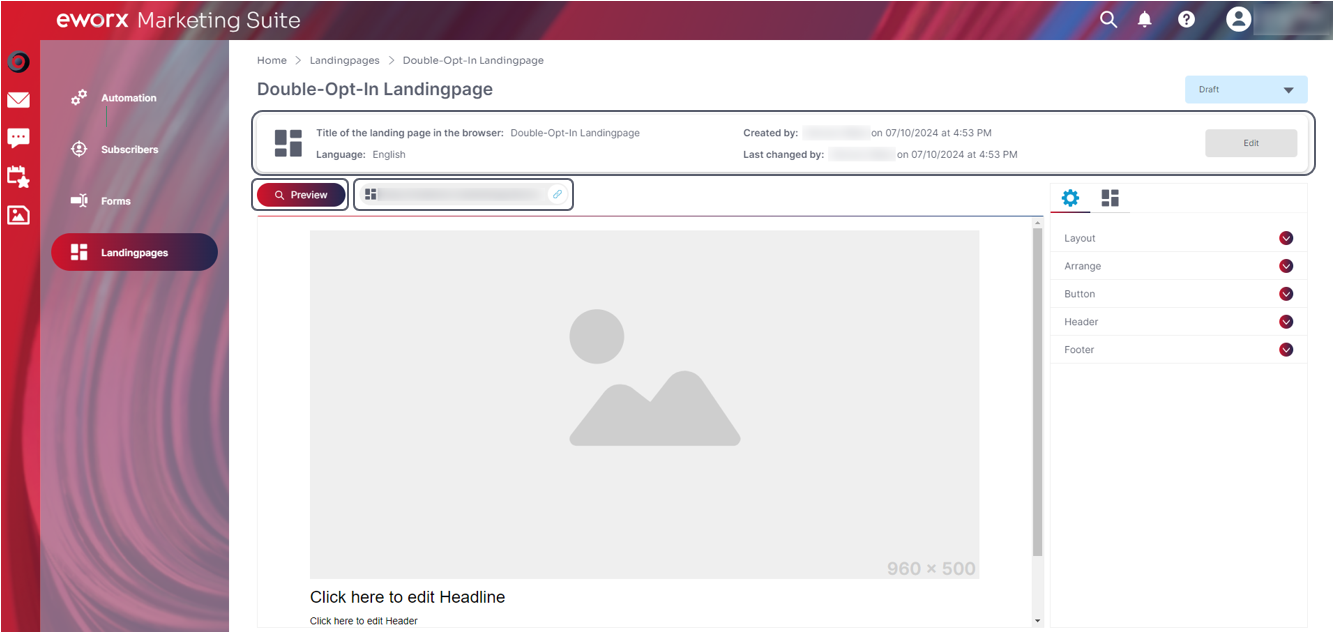
The information for the landing page (name, description, title of the landing page in the browser) can be changed at any time in the editor.
Changes to the content are displayed directly in the editor and saved automatically. However, you still have the option of displaying a preview. You can also check the display of your landing page in the mobile version.
Next to the preview button is the link with which the landing page can be called up in the browser. The link can be copied by clicking on the chain symbol. This means you can also link to a desired landing page outside the eworx Marketing Suite. You can also check the display in the browser by pasting the link into the browser line.

Creation of landing page content:
Creating the content is very simple and straightforward using the landing page editor.
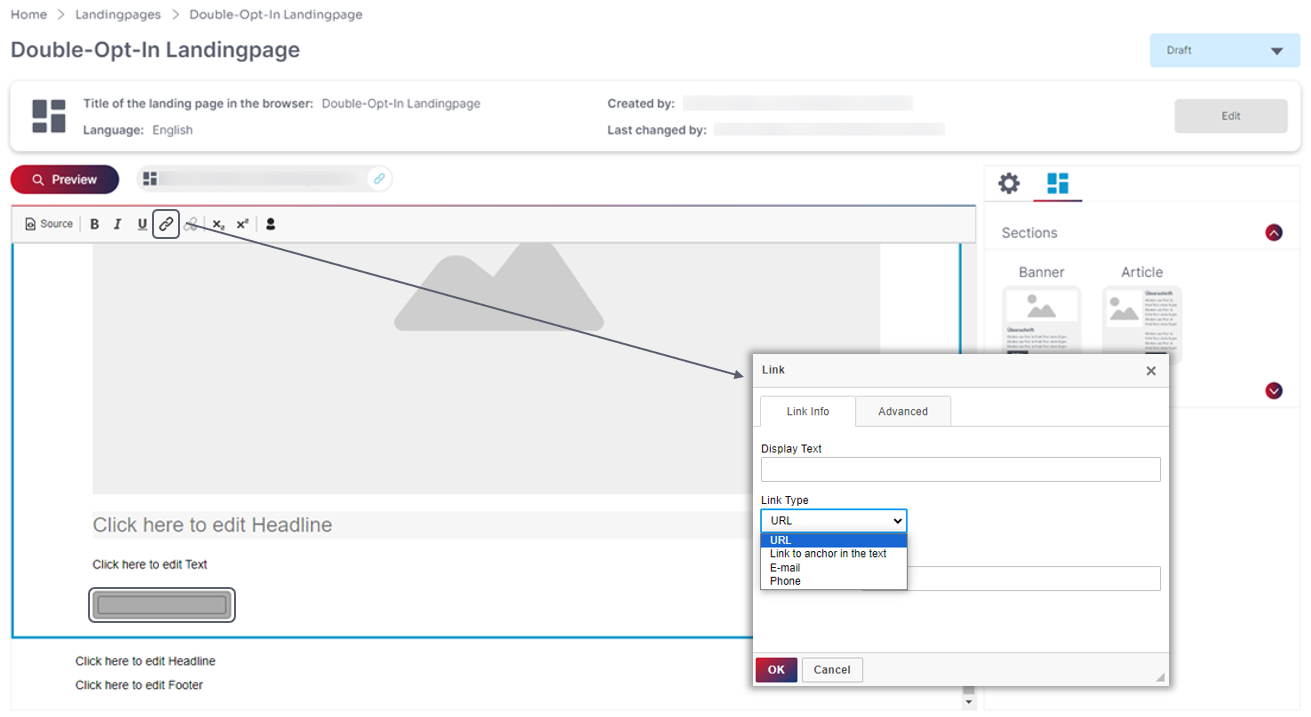
By default, the content contains a header (consisting of a header image, heading and text field) and a footer (consisting of two text fields). As with the email campaign editor, images or media from the eworx Marketing Suite media database or via drag & drop can be inserted quickly. By clicking into a text field, a toolbar opens at the top, which allows you to adjust the formatting of the text, or to link a desired text. As in other areas of the eworx Marketing Suite, personalization elements such as „recipient fields“, „text modules“ or „form fields“ can be inserted using the placeholder (male symbol in the toolbar).

You can make further adjustments in the settings on the right-hand side:
Layout:
In Layout, you can set the background color (outer border), background color for the content area, the font as well as the font and link color.
Arrange:
In Arrange, you can set the spacing Offset top and Offset bottom. This setting is used to set the distance between the content elements and the top or bottom edge of each section.
Button:
It is also possible to add a button to the header. In the settings, you can define the background color of the button, the font and the font color. You can also set a frame as well as the frame color and thickness. You can also define a rounding, Hower effect and the alignment of the button here.
Unlike email campaigns and forms, the button on landing pages must be linked via the toolbar. First enter the desired text by clicking in the button text field. You can then select this text and link it via the chain symbol in the toolbar.

Header:
In the settings for the header, you can choose between the „Default Layout“ and an „Individual Layout“.
With the „Default Layout“, the settings made under „Layout“ are adopted.
If the „Individual“ layout is selected, the desired values can be stored directly in the header settings.
Footer:
As in the header settings, you can choose between a the „Default Layout“ and an „Individual Layout“ for the footer.
Sections:
In addition to the settings, you will find ready-made sections (banners and articles) as well as individual elements (image field and text), which can be easily dragged into the layout and customized.
After inserting sections or elements, you can complete your content with headings, texts or buttons (only possible for sections).
The individual sections and elements can be customized independently of the overall layout.
Updated 2 months ago
