[EN] Personalizations and Placeholders
How to use personalization correctly in the eworx Marketing Suite
Several areas can be personalised in the eworx Marketing Suite. From personalised salutations to individual text components, everything is possible. You can find out where and how exactly you can personalise your content in this whitepaper.
Personalising email campaigns
You have many options when it comes to personalising email campaigns. We show you what is possible with the eworx Marketing Suite.
Sender & subject
The sender (sender name and address) as well as the subject and preview line can be personalised.
Personalising the sender makes sense, for example, if the e-mail is to be sent in the name of the respective customer advisor or similar.
Important: When personalising the sender address, however, please note that the delivery quality cannot be checked in the “Check”.
Next to the fields “Sender name”, “Sender address”, “Subject” and, if available, also in the “Preview line”, there is a little man symbol which you can use to insert the desired placeholders. Here you can select “Subscriber fields”, “Text components” “Form fields”. If you have activated events, you can also insert “Event data”.
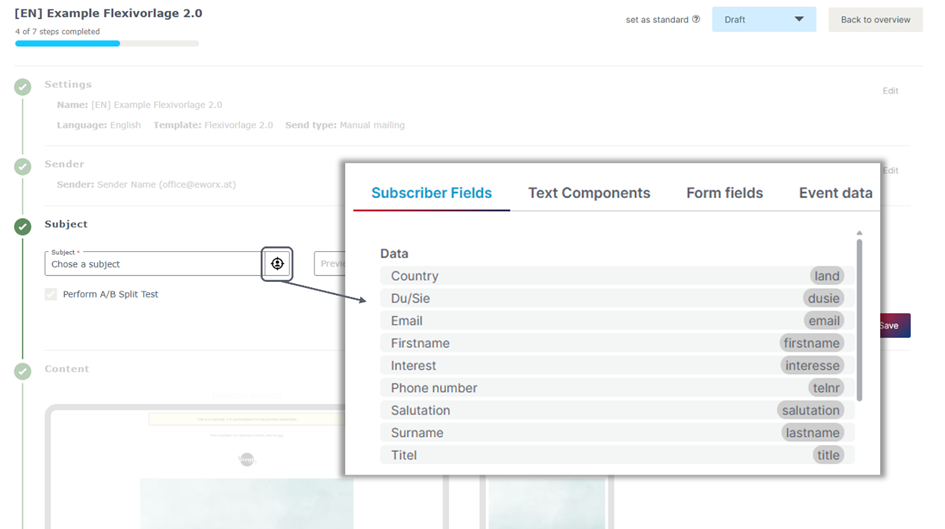
When inserting a “Subscriber field”, the field must already exist under “Subscriber” > “Subscriber fields”. You can also create a new “Subscriber field” here. It is important that the corresponding “Subscriber fields” are filled in for your subscribers. If no values are stored for your subscribers, no text will be displayed instead of the placeholder.
Tips:
If the desired “subscriber fields” are not filled for all subscribers, a “text component” can also be created as an alternative. With the help of “Text components”, it is also possible to define a text if the conditions are not met (e.g. “Subscriber fields” are not filled). The “text components” can be created under “Subscribers” > “Text components”. You will find detailed instructions in the following whitepaper.
• Your subscribers should be able to recognise who sent the email before it is opened. It is best to send with a sender address that can be traced back to your company..
• Formulate the subject line in such a way that it entices subscribers to open it and they can already guess what the content of the newsletter contains. The preview line should be seen as an extension of the subject line. In both cases, the limited space available must be taken into account.
Content
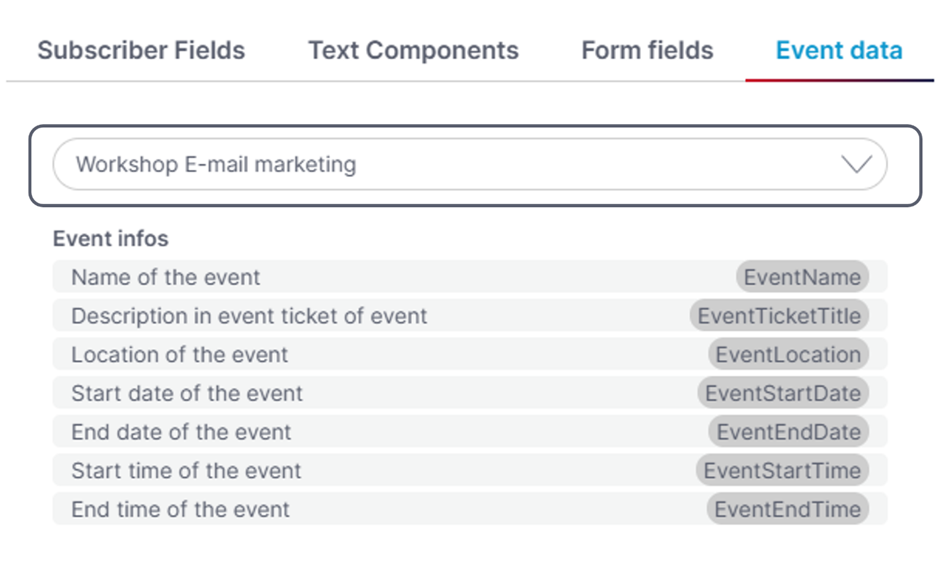
When you click in a text field, a text editor appears in which you will again find a little man symbol, which you can use to insert a placeholder. Here you can insert “subscriber fields”, “text components”, “form fields” and also “event data” (if you have activated events). Inserting placeholders works in exactly the same way as for the sender and subject and is described above.
If a “form field” or “event data” is used for personalization, an (event) form/event must first be selected. The fields available in the form/event are then listed, which can then be used for personalization.
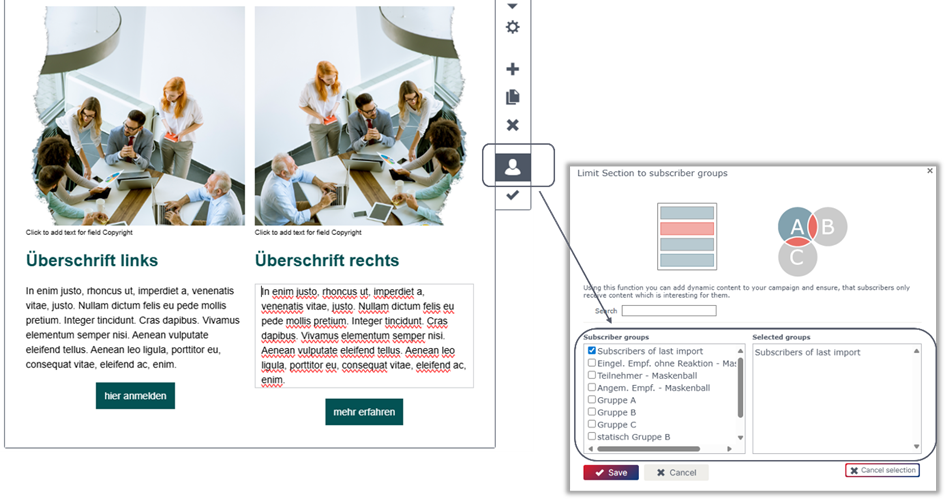
Not only can personalization elements be added to the content of your email campaign, but it is also possible to restrict entire sections to asubscriber group. This allows you to personalise your campaign with dynamic content so that your subscribers only receive content that is specific to them. To do this, click on the little man symbol (Restrict) of the respective section and select the desired subscriber group that contains the subscribers to whom the section should be displayed. You also have the option of selecting multiple subscriber groups.
Personalising forms
Forms can also be personalised. Here we show you in which areas this is possible.
Content
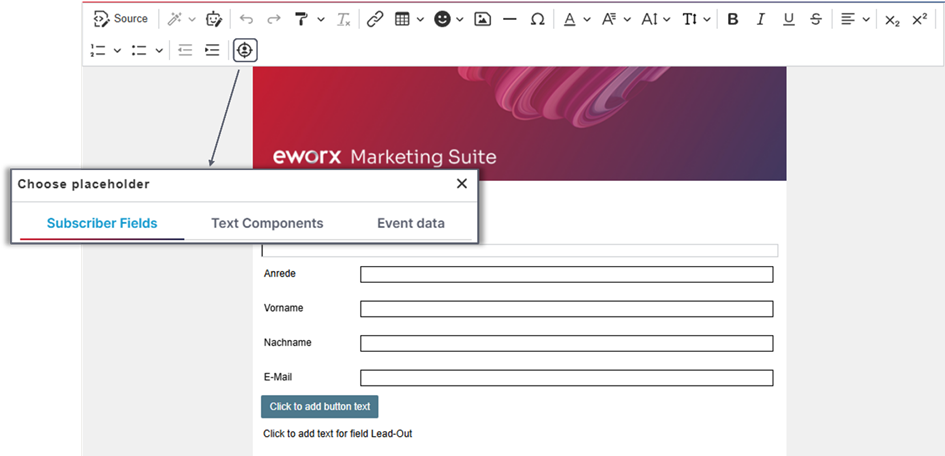
Inserting subscriber fields
Among other things, "subscriber fields" can be inserted in the "Content" of the form. "Subscriber fields" are the data that is saved and displayed in the subscriber database, e.g. title, first name, surname, email.
Under the "Content" tab, you will find the "Subscriber fields" category on the right-hand side. Here you can simply drag and drop existing "subscriber fields" into the content of the form and position them as required.
Each field can be edited in the form editor. By clicking on the cogwheel symbol, all the corresponding setting options appear on the right-hand side. For example, you can set the “Default value” to be taken from the subscriber. This means that the first name, surname and e-mail address, for example, can be pre-filled.
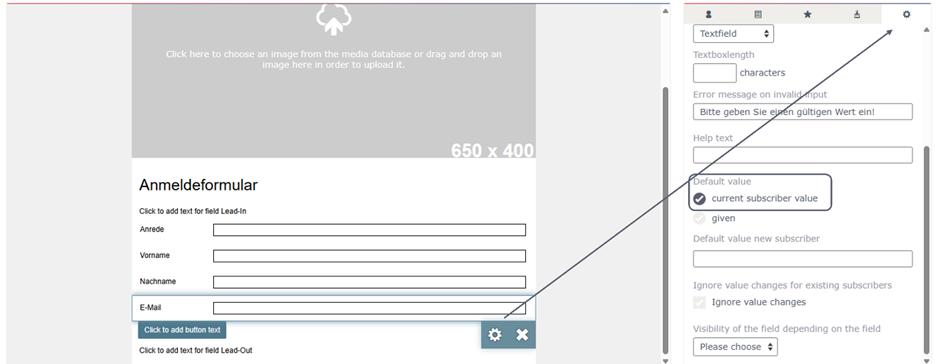
Important: Please note that the content of the form can only be personalised when used in email campaigns. If the form is integrated on the website, the values in the “subscriber fields” cannot be pre-filled, as no subscriber data can be retrieved here.
Personalization in the text field
A text field is available in the “Content” of the form. However, additional text fields can also be inserted via “Extras” (on the right-hand side). When you click in a text field, the text editor appears, which contains a little man symbol to insert a placeholder. You have the option of selecting “subscriber fields” or “text components”. If events are enabled, “Event data” can also be inserted.
Inserting placeholders works in the same way in the entire eworx Marketing Suite and is described above.
Further information on creating forms can be found in the whitepaper “Form editor”
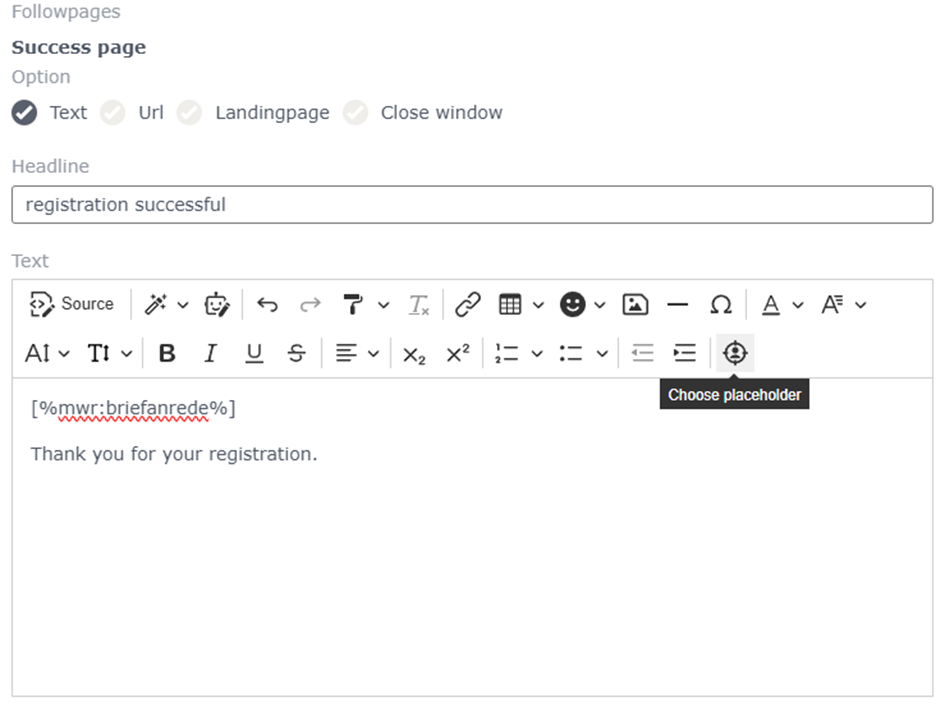
Followpages
In the “Action” tab of the form, it is possible to set up “followpages” (“success” and “error” pages). You can also insert placeholders for personalization here using the text editor:
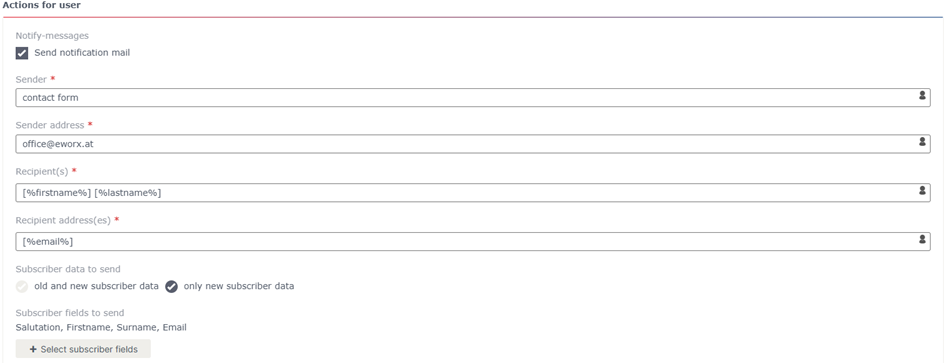
Notify message
Under “Actions for users”, you have the option of setting up a “Notify message”. Here you can personalise the sender name, sender address, subscriber name(s) and subscriber address(es).
Note: ”Notify messages” should generally not be sent to subscribers, as the content of the message cannot be formatted here. If you would like the subscriber to receive an email (e.g. confirmation email) after submitting the completed form, we recommend setting up a “Campaign on submit” or an “Automation”.
Further information on creating forms can be found in the whitepaper “Form editor”
Personalization using text components
“Text components” are also used for personalization. Within our eworx Marketing Suite, "text components" are used to integrate elements that differ from each other due to different data of the individual subscribers as placeholders in your newsletter. The placeholder is replaced by the actual values in the original mailing. We have created a separate whitepaper for the use of "text components" in which we take a detailed look at personalization with text components.
Personalise SMS campaigns
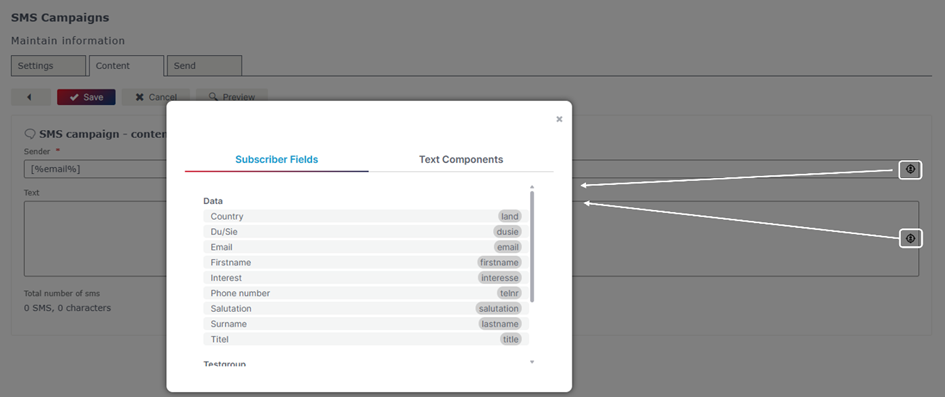
“SMS campaigns” can also be personalised. It is possible to insert placeholders for “Subscriber fields” and “Text components” in the “Sender” and “Text” fields.
In the “Sender” and “Text” fields, the little man symbol can be found on the right-hand side, which can be used to insert the placeholders:
Inserting placeholders works the same way in the entire eworx Marketing Suite and is described above.
Updated about 2 months ago