[EN] Survey incl. profiling
Simple survey including click profiling of your recipients
Find out about the interests of your subscriberswith ease – the eworx Marketing Suite supports you in this. For example, send your subscribers a short survey via email. By clicking on the respective interest categories in your mailings, subscribers can indicate which topics they are particularly interested in.
You can save these values directly in your subscriber database for use in later segmentations. This is a simple way to increase the relevance of your mailings and inspire your subscribers. We'll show you how easy it is with the eworx Marketing Suite Workflow Editor.
What preparations do I need to make for this workflow?
Before you start creating the workflow in the eworx Marketing Suite Workflow Editor, we recommend that you prepare all the necessary elements, such as forms, email campaigns, etc. In our practical guide, we summarise these elements for you in a checklist.
- Email campaign: Campaign including survey
- Email campaigns: Interest-based mailing including thank you
- Subscriber groups: Participants/non-participants in the survey
- Subscriber field: Selection field for interests (newsletter types)
Have you created all these elements and, if necessary, integrated them into the website, activated them or set email campaigns to “ready to send”? Then you're ready to go!
What do I need to consider when creating the survey campaign?
Create an appealing campaign to promote your survey – if necessary, you can also use additional incentives, such as free shipping of a study or discount promotions, to increase participation. One part of your campaign should be the classification of your areas of interest. For example, define three topic areas and let subscribers click on links to indicate which topics are of interest to them.
To find out later which subscribers have already participated and which have not, assign a static subscriber group to the respective links – this way, all clickers will be classified as participants.
Of course, you can also set the relevant interests of subscribers in the link options – but in this case, we recommend doing this with the workflow editor. This gives you a better overview of the survey results and allows you to take follow-up measures based on the respective settings – for example, the automated sending of multi-stage campaigns.
What do I need to bear in mind when creating the subscriber field for newsletter types?
We have prepared a step-by-step guide to using newsletter types in another whitepaper. We definitely recommend working with this type of subscriber field. It allows you to tailor your communication measures even better to the needs of your subscribers. In addition, you can use the defined newsletter types for your unsubscribe process, and your subscribers can subscribe or unsubscribe only to the desired category.
For the use of this workflow, including the profiling of your subscribers, we recommend using newsletter types. Of course, you can also work with classic selection or option fields.
How do I create the process in the eworx Marketing Suite Workflow Editor?
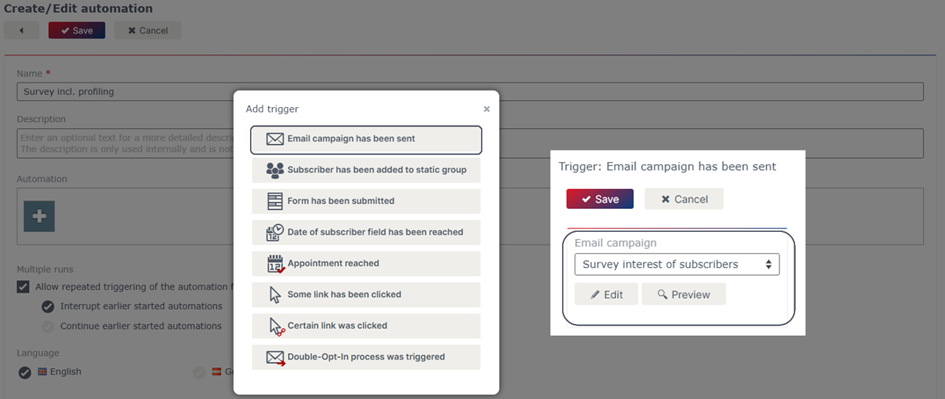
Have you created all the additional elements? Then switch to the eworx Marketing Suite Workflow Editor. You can find this in the navigation bar under “Automation”. Add a new workflow and give it a meaningful name. In this case, the campaign including survey is a suitable trigger or starting point.
To give your subscribers the chance to respond to your survey in the first place, you need to use a wait element. Here, you define how many days you want to wait before the participants are checked.

After the selected time period has elapsed, there are two different options for how the workflow can proceed. On the one hand, the recipient may have already participated in the survey, but on the other hand, they may not have done so yet, and we would like to remind them of the survey with a reminder.
Option 1: Subscriber has already participated in the survey
If the subscriber has already participated in the survey, they are automatically saved in the corresponding Subscriber group by clicking on the link. You can use these groups as filters for the further course of the workflow.

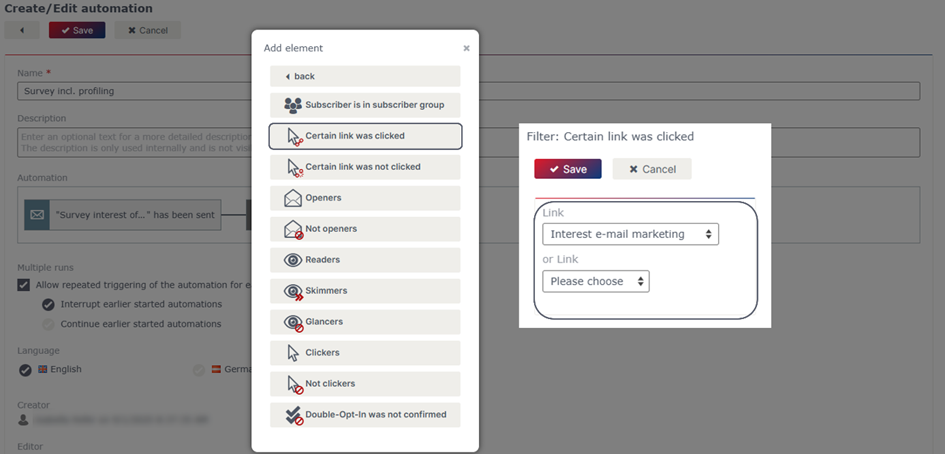
To get an overview of which Subscribers clicked which link and how the interest of the individual subscribers is distributed, it is best to filter by the corresponding links in the campaign. If you have several links in your mailing that indicate the same interest, use the “or link” function.
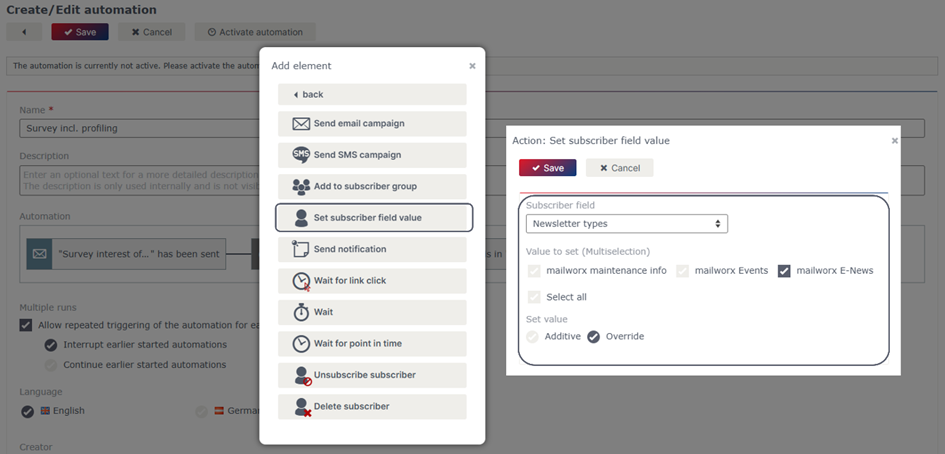
Do this for all your interest categories. To ensure that the interest of your subscriber is also documented in the subscriber database, use the action “Set subscriber field value”. Depending on the link click, you can define the respective interest in a specific topic.
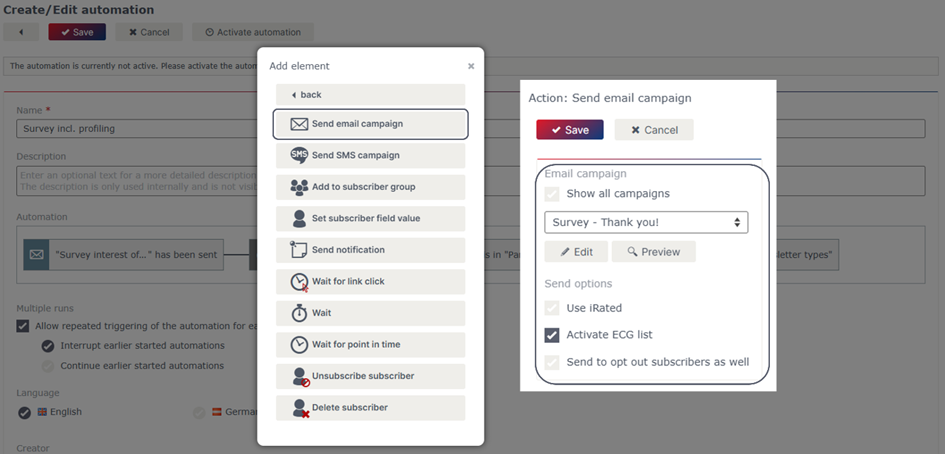
As a small thank you for participating in the survey, you can also send your participants a thank you campaign including exciting content on their specific topic or interest. To do this, link the prepared campaigns to the respective link click.
Option 2: Subscriber has not yet participated in the survey
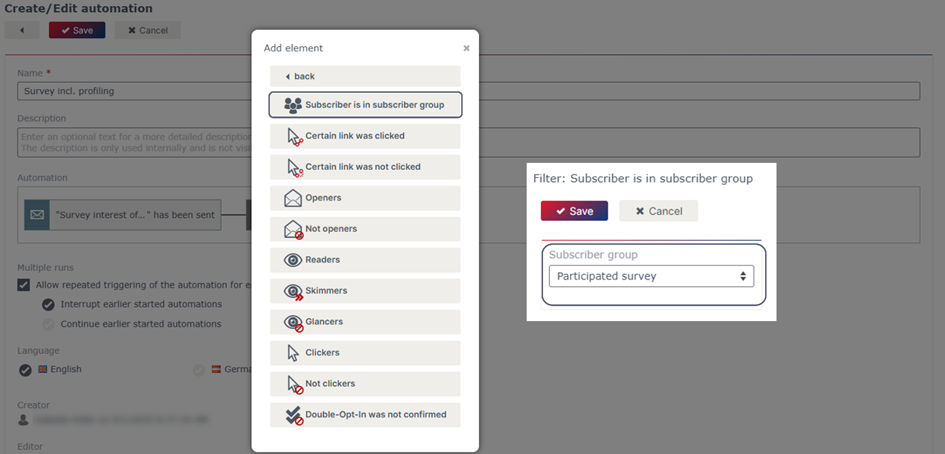
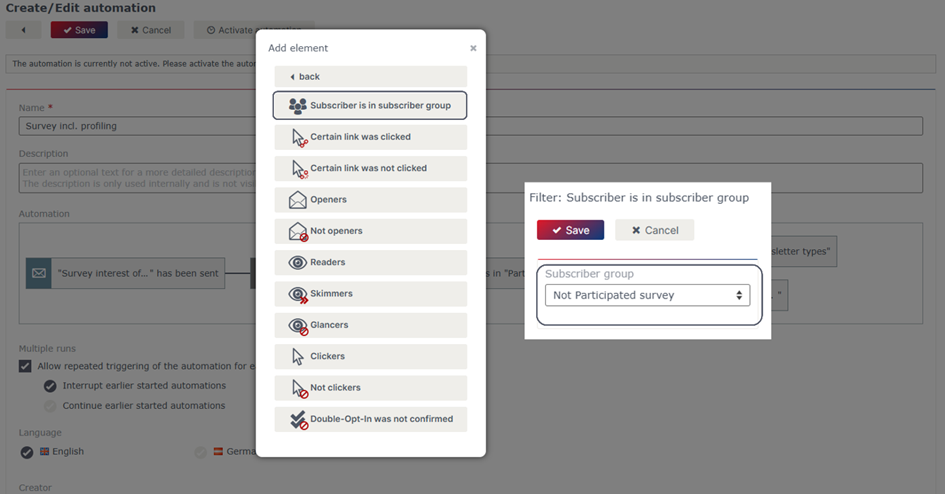
By using a dynamic subscriber group that includes all subscribers who are not in the static subscriber group of the survey, you can also define a further process for non-participants. To do this, use the filter “Subscriber is in subscriber group” directly after the wait element.
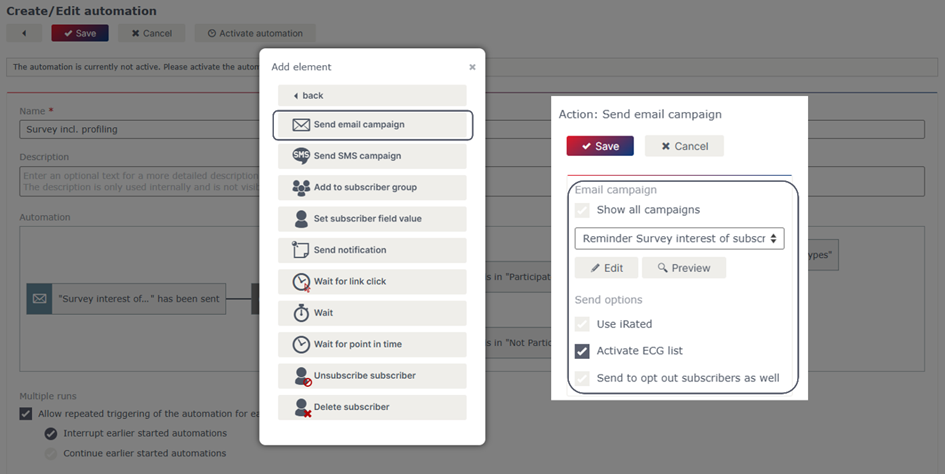
To remind subscribers who have not yet participated in the survey, you can send them an appealing reminder campaign. To do this, simply link the prepared mailing to the filter you inserted earlier.
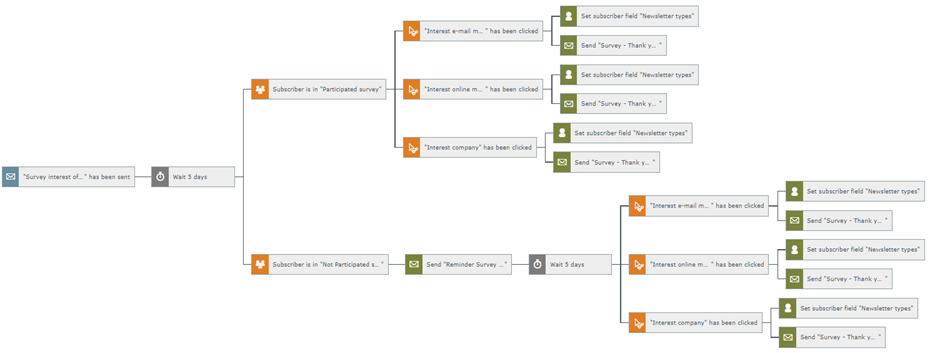
Give the subscribers of the reminder campaign another chance to respond to your survey – use the wait element for this. To ensure that all those who have decided to participate in the survey are also surprised with a thank-you email, you must also integrate the steps from option 1 into this process. Once you have made all the settings, the finished workflow will look like this.

Important note
Ensure that you have tested and activated the workflow before sending the triggering campaign or using the form. The workflow does not work retroactively, but only from the time of activation.
Updated 8 months ago