[EN] Shared Content
Create an use shared content
This feature is only available to customers with the Enterprise billing model. Furthermore, the necessary rights must be granted to the desired users. If you have any questions, please contact our service team.
With the help of shared content, you can create a section only once and save it in a library. You can then easily insert the individual sections into multiple email campaigns.
In this whitepaper, we show you how to create, edit and insert shared content into your campaigns.
How do I create shared content?
There are basically two ways to create "shared content".
We will first explain the simplest and quickest option.
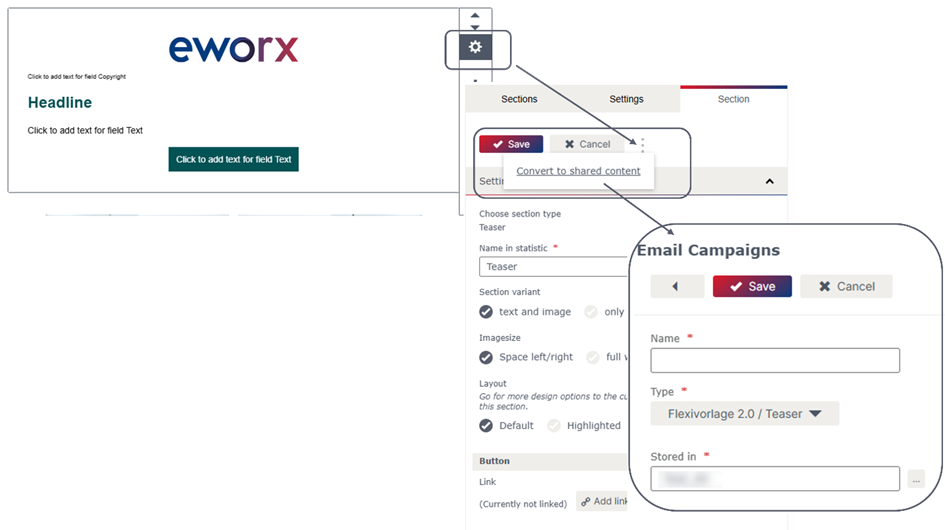
If you have already created a section in an email campaign that you would like to reuse in other campaigns, you can convert this section into "shared content". To do this, edit the desired section and click on the three dots next to the “Save” and "Cancel" buttons. You can then select "Convert to shared content". A new browser window will open where you can enter the name of the "shared content" and change the type (section) and storage location, which is already preselected.
The “Shared content” is stored in a library, which can be accessed under “Campaigns” > “Shared content”.
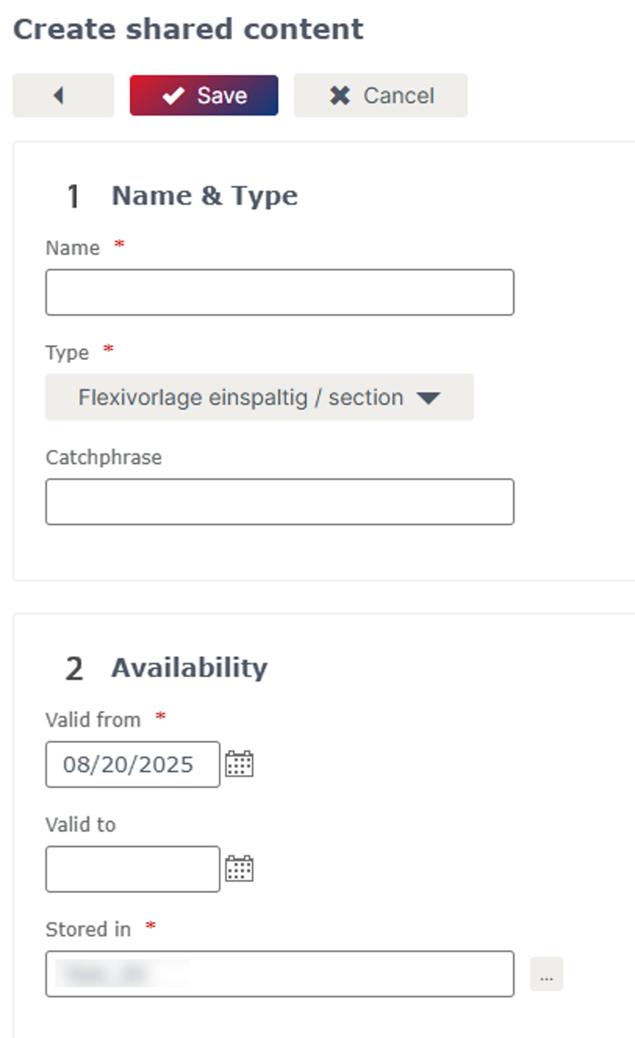
You can also create “Shared content” under “Campaigns” > “Shared content” by clicking on the “+ Add” button.

You must specify not only the name but also the type (section). If there are several templates in your client, the desired type or section (e.g. banner, article, etc.) must be selected from one of the different templates. You can also store keywords, which makes it easier to search for “shared content”. In addition to the storage location, you can also select the validity. This allows you to restrict the “shared content” so that it can only be selected within a certain period of time (e.g. for promotions).
Once you have saved the settings, you can define the content. In the “Preview” tab, you can check how the “Shared content” will be displayed. The “Statistics” tab provides you with an overview of the campaigns in which the “Shared content” is used. Here you can also see which user inserted the “Shared content” and when.
Can I edit existing “shared content”?
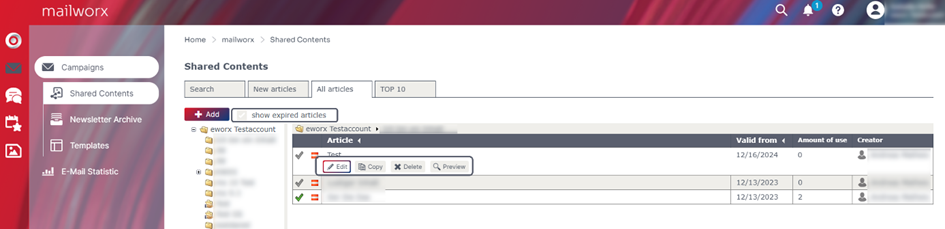
Under “Campaigns” > “Shared content”, you can not only create new “shared content”. Here you have an overview of all existing “shared content” and you can also edit, copy or delete “shared content”.
In this overview, you also have the option of displaying expired posts.
How do I add “shared content” to my campaign?
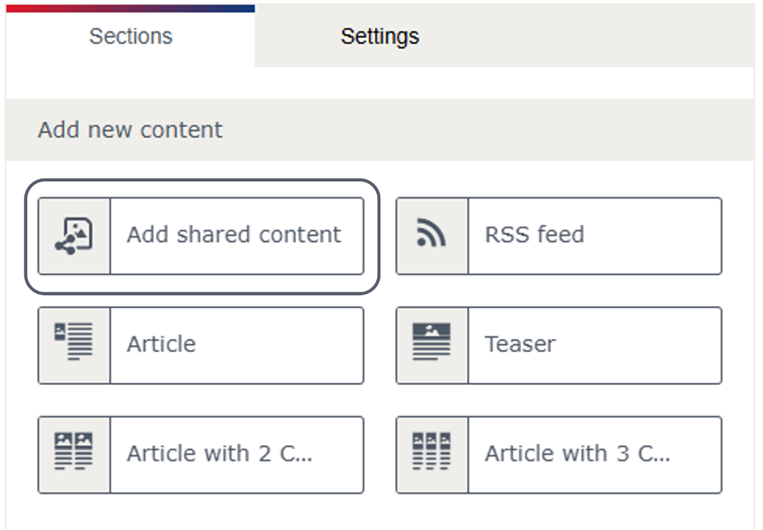
As with other sections, you have the option of inserting “shared content” into your campaign. To do this, switch to the campaign editor for the desired campaign. On the right-hand side, next to “Settings” in the “Sections” tab, you will find not only the “Sections” available in the template, but also the option to insert “Shared content”.
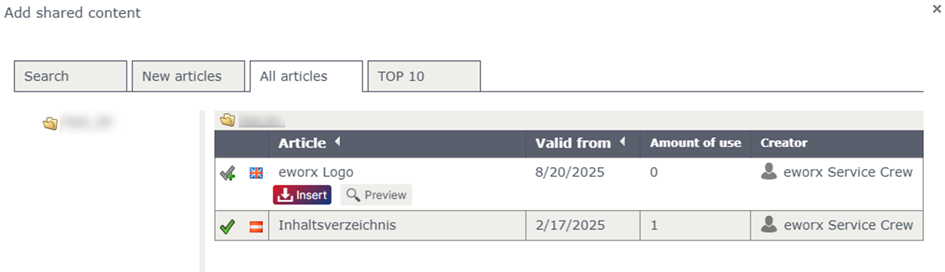
If you select that you want to insert “Shared content”, you will be taken to the same view that you find under “Campaigns” > “Shared content”. Before inserting the desired content, you also have the option of opening a preview of the “shared content”.
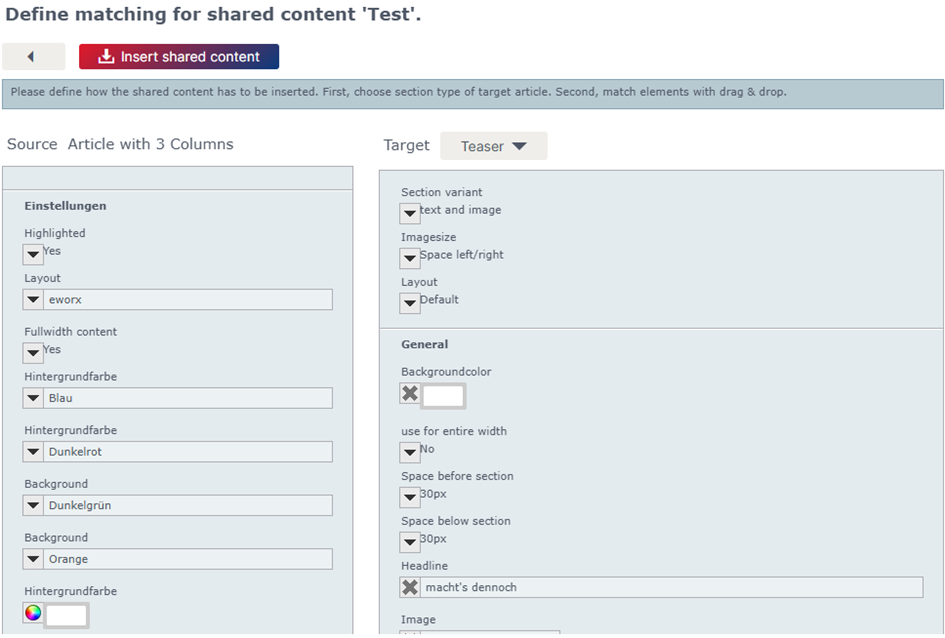
After selecting the desired “shared content”, you must define how the shared content should be inserted. First, the desired section type for the target post must be defined. Then, you must assign the elements using drag & drop and configure the section settings.
You then also have the option of editing the section as usual.
Can I mark a post as “final”?
Customers of the Enterprise billing model have the right to mark a post as final. This function allows you to fix posts in an email campaign – this section can then no longer be changed or deleted.
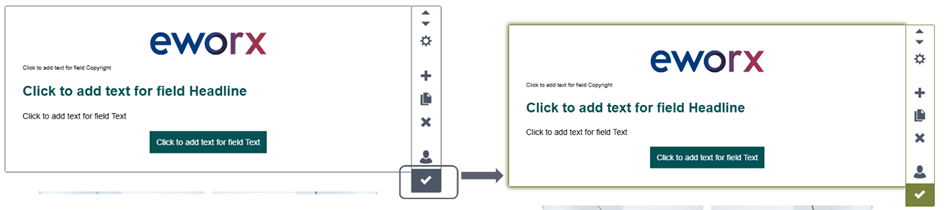
When you hover over the desired section, a bar appears on the right-hand side where you can edit the section, among other things. This is also where you will find the “Mark post as final” function. Click on the tick and the symbol will be highlighted in green and the section will be framed in green.
Updated 8 months ago