[EN] Events: Structure and process
This whitepaper outlines the complete process for creating an event in the eworx Marketing Suite – from creation through to registration, communication and check-in. It clearly explains how the individual elements interrelate and how they are implemented step by step.
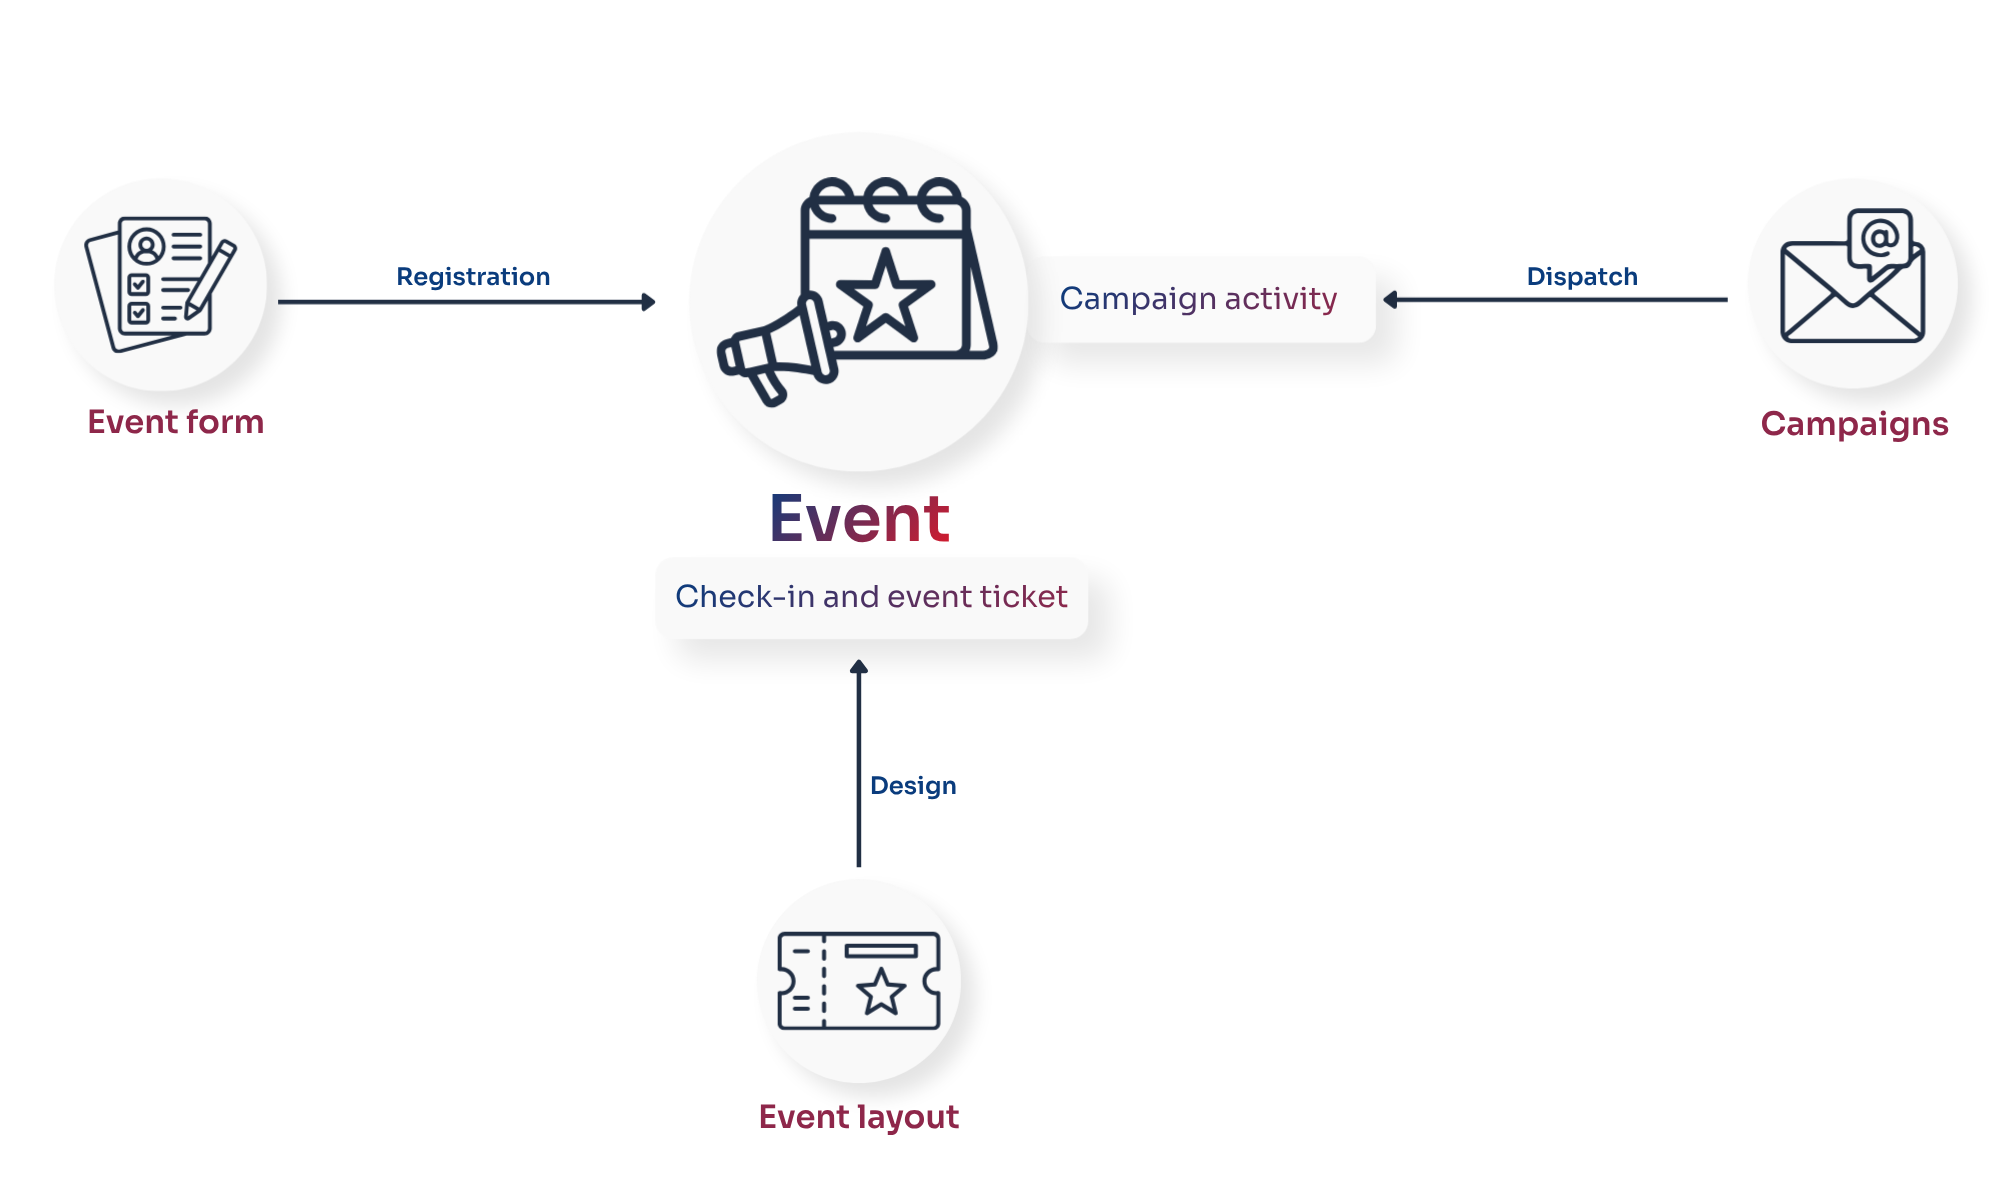
How are the different aspects of events connected?
Creating events – step by step
The following process outlines the steps involved in creating an event and how each stage builds on the previous one. These steps guide you from setting up the event through to the participants’ check-in.
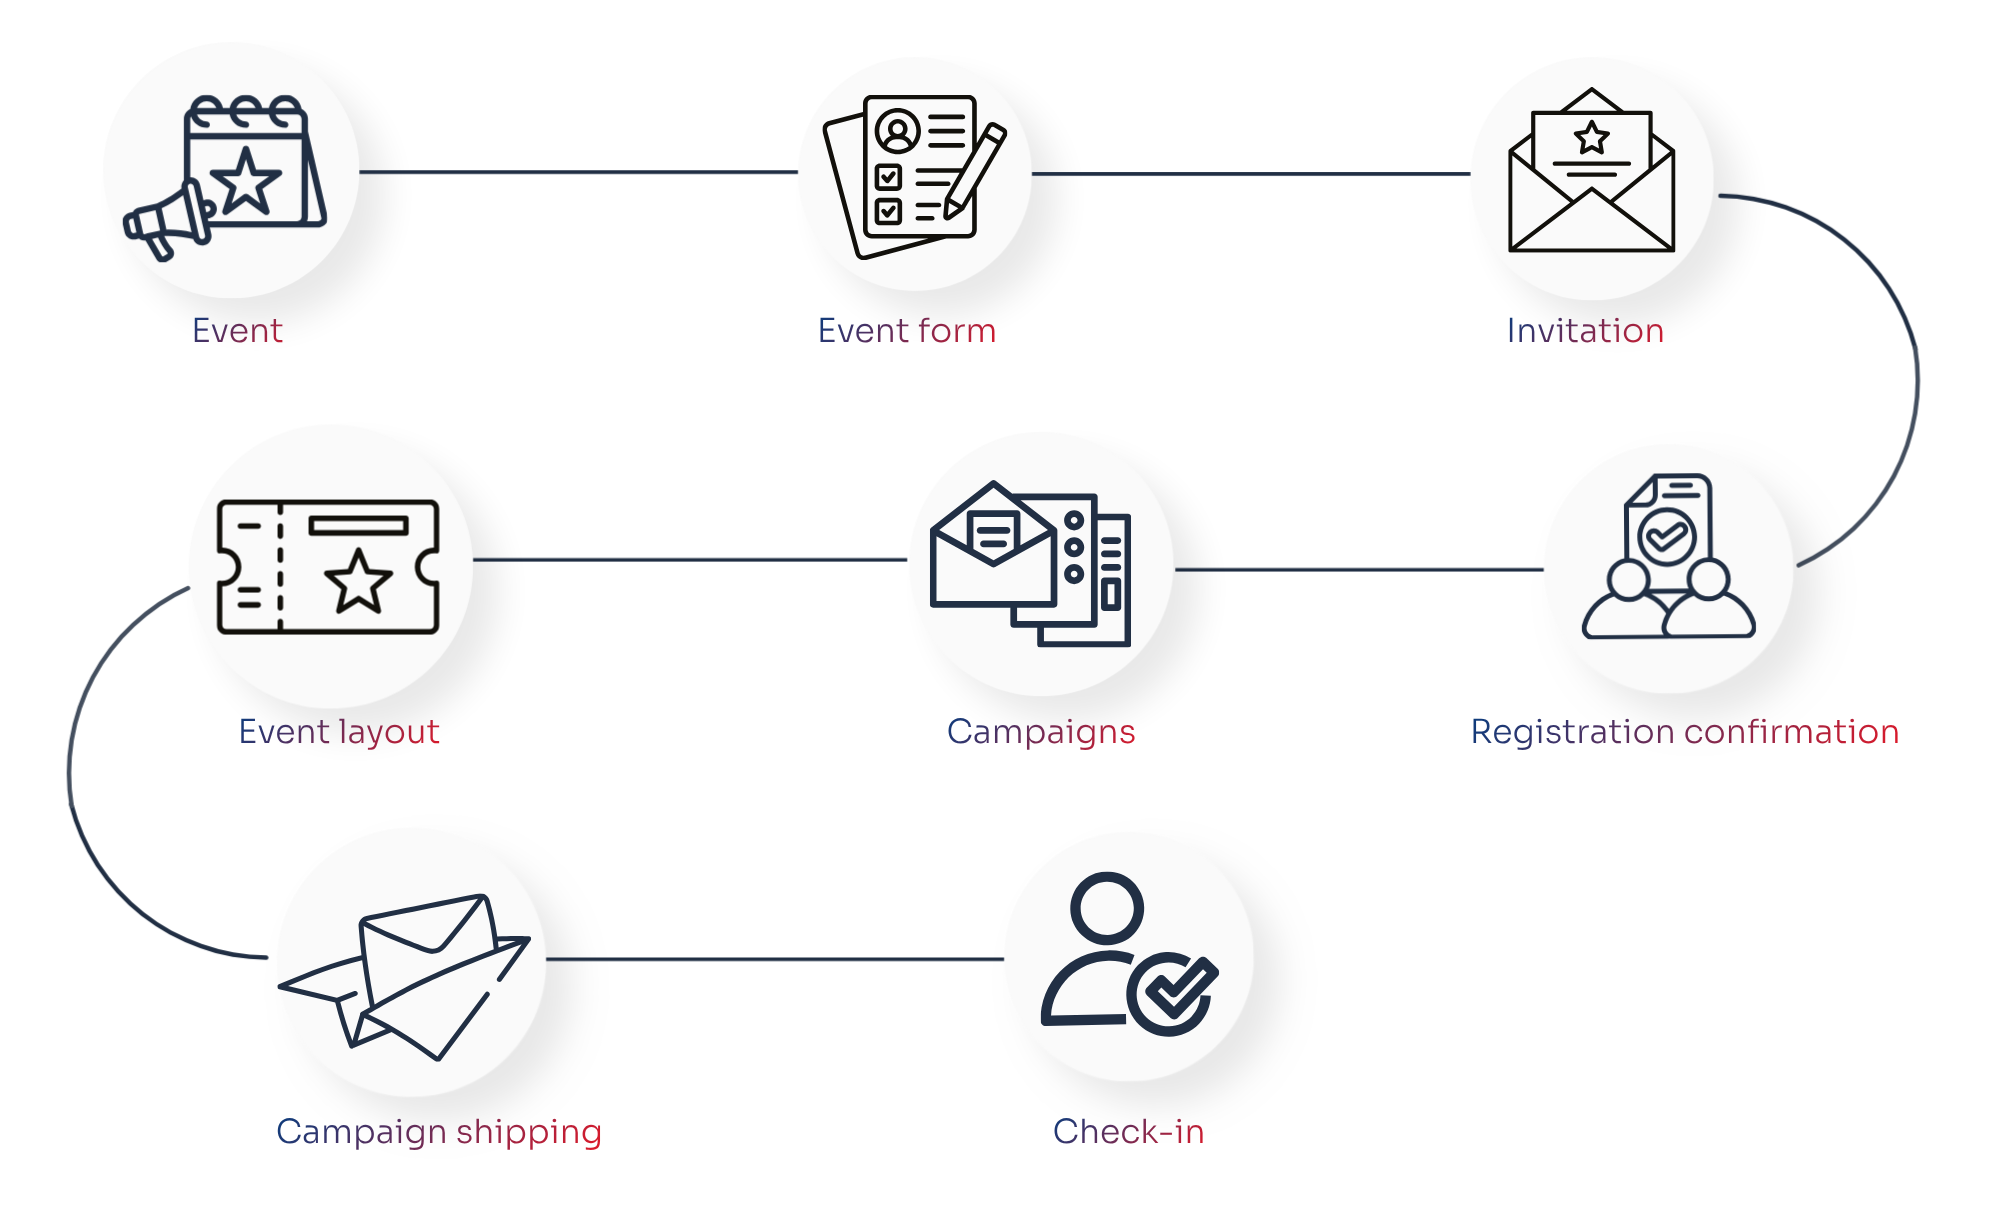
Step 1: Create an event
- Event = Base
- Key details of the event (date, time, venue)
- Set a calendar entry (optional)
- Select sub-events and create them later (optional)
- Read more
Step 2: Create an event form
-
Registration for the event (subscribers will automatically be added to the guest list)
-
Set the content and various settings (as with normal forms)
-
Number of participants, waiting list, define accompanying person (the ‘Registration’ tab)
-
Customising feedback pages:
- Waiting list: Registration tab
- cancellation: Rejection tab
- Registration successful: Action tab
-
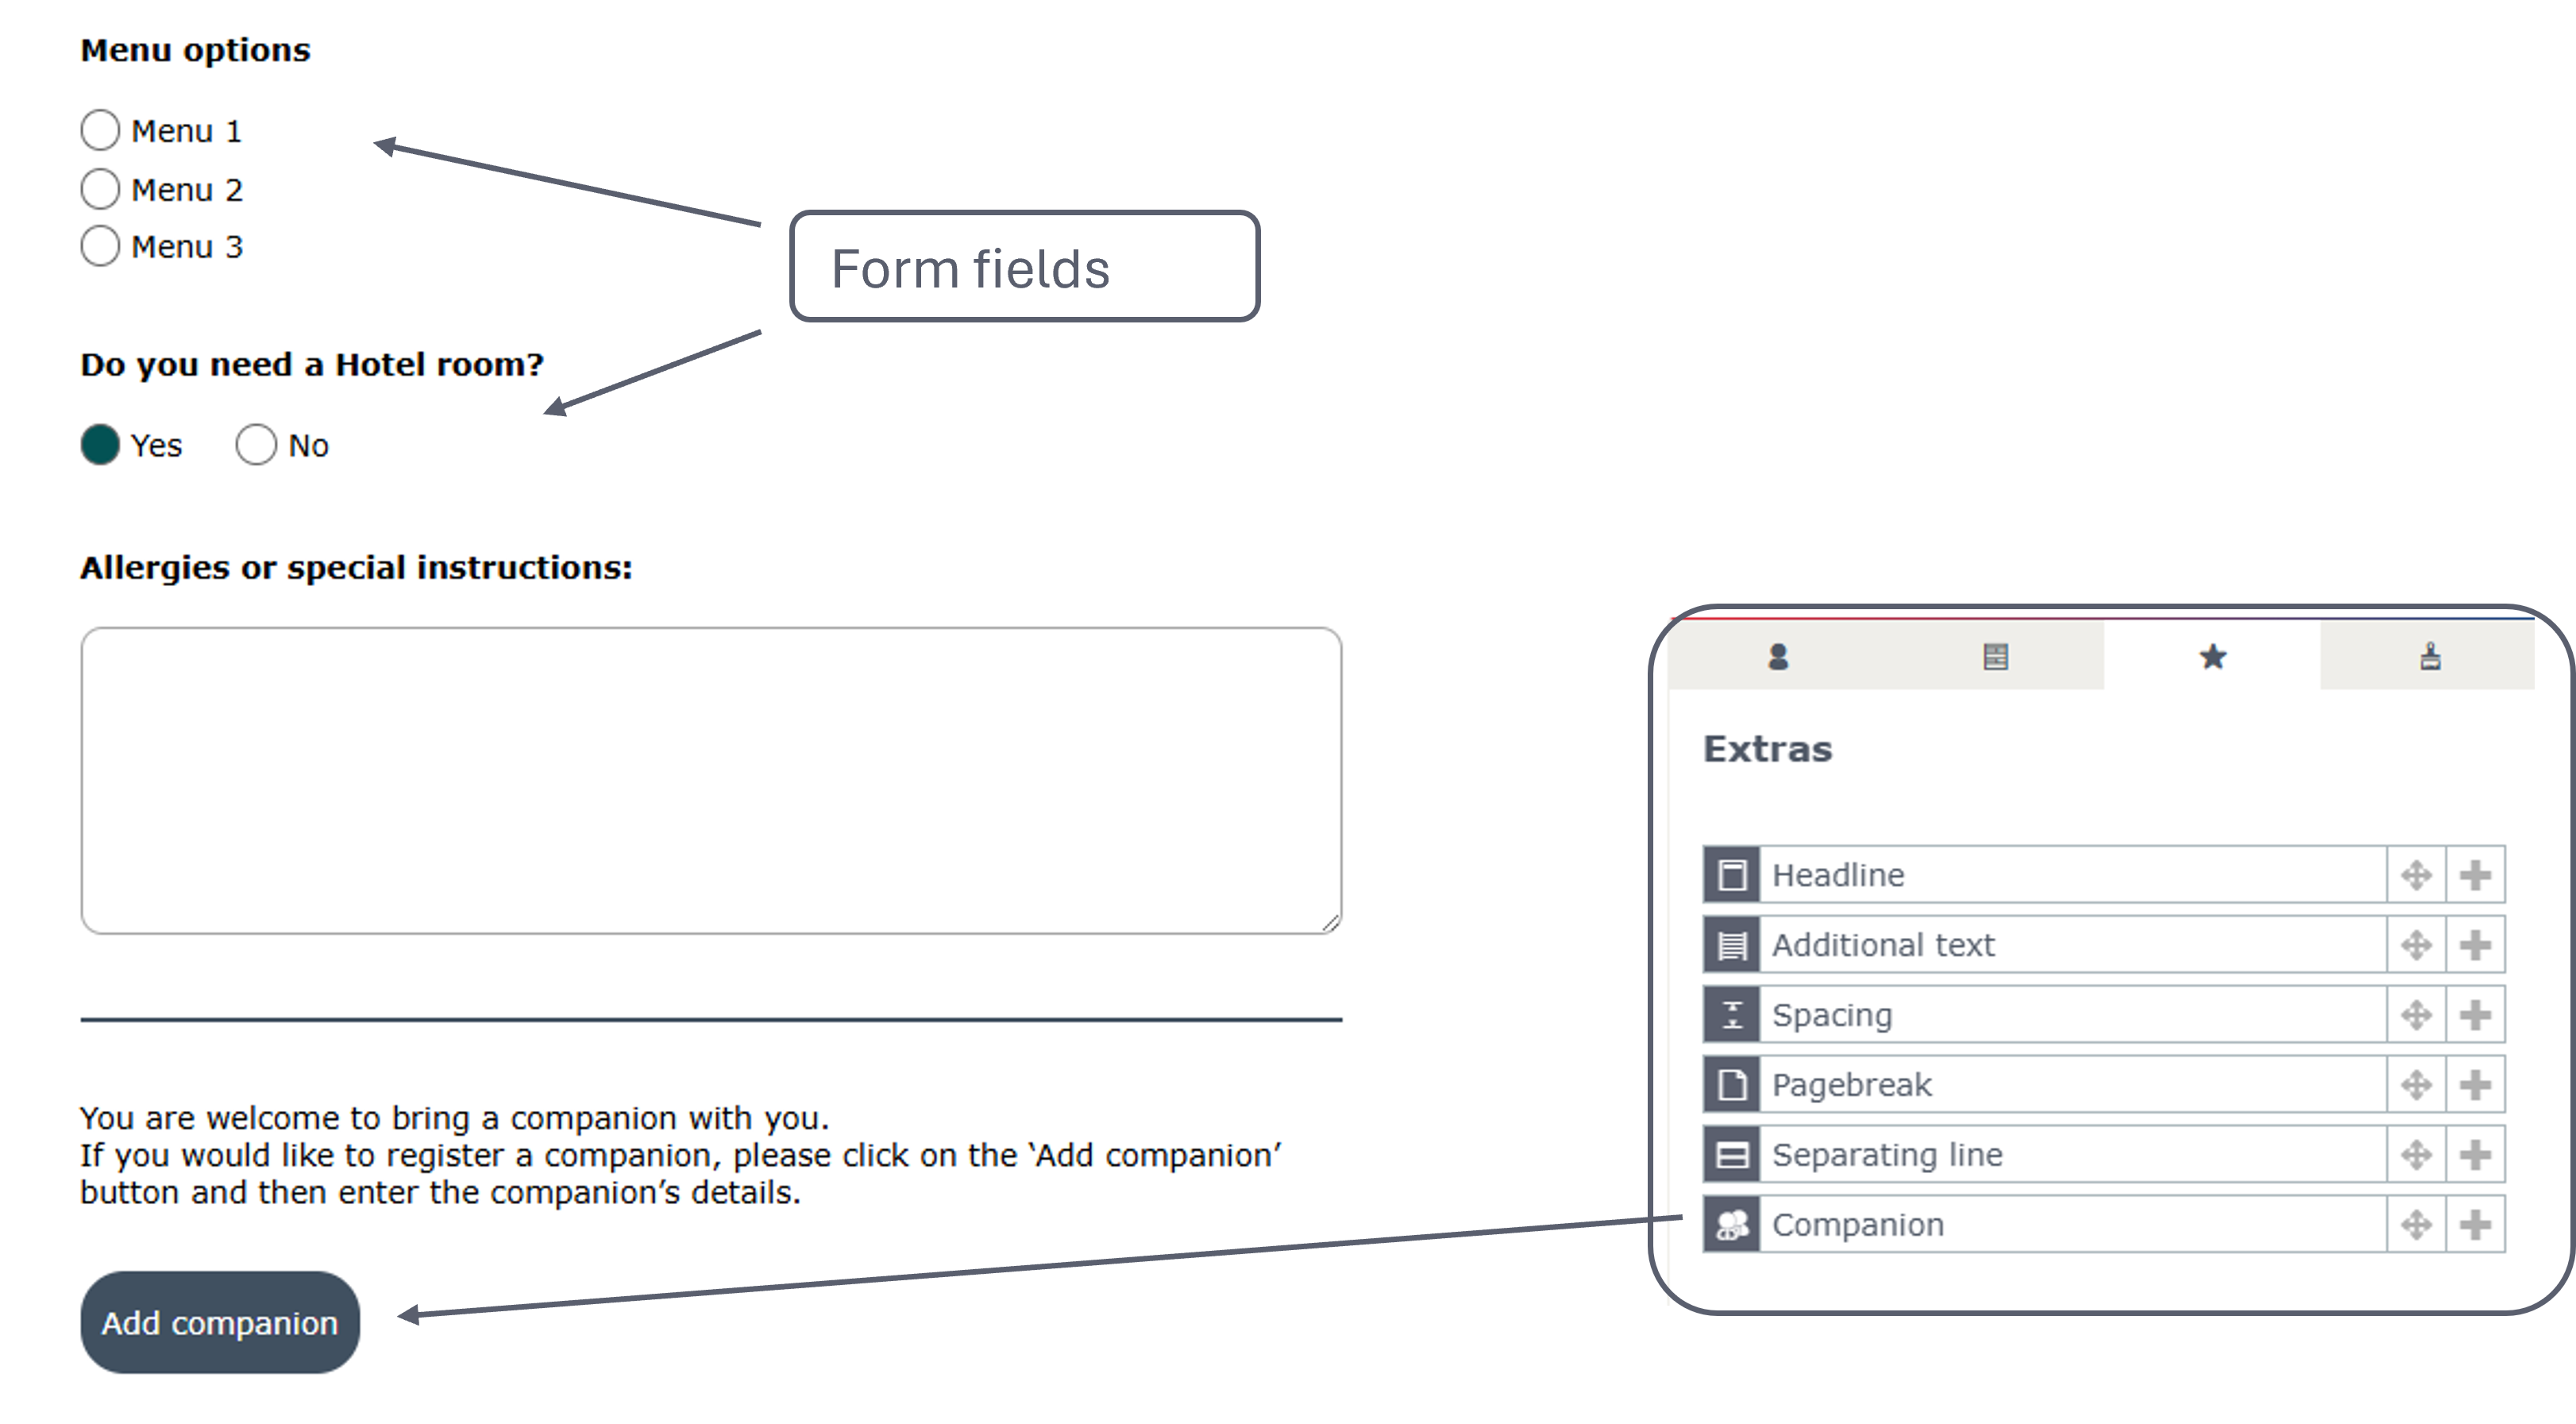
Request additional information (Content tab)
-
Form fields for example for menu selection
-
Add the ‘Companion’ field under ‘Extras’
-
-
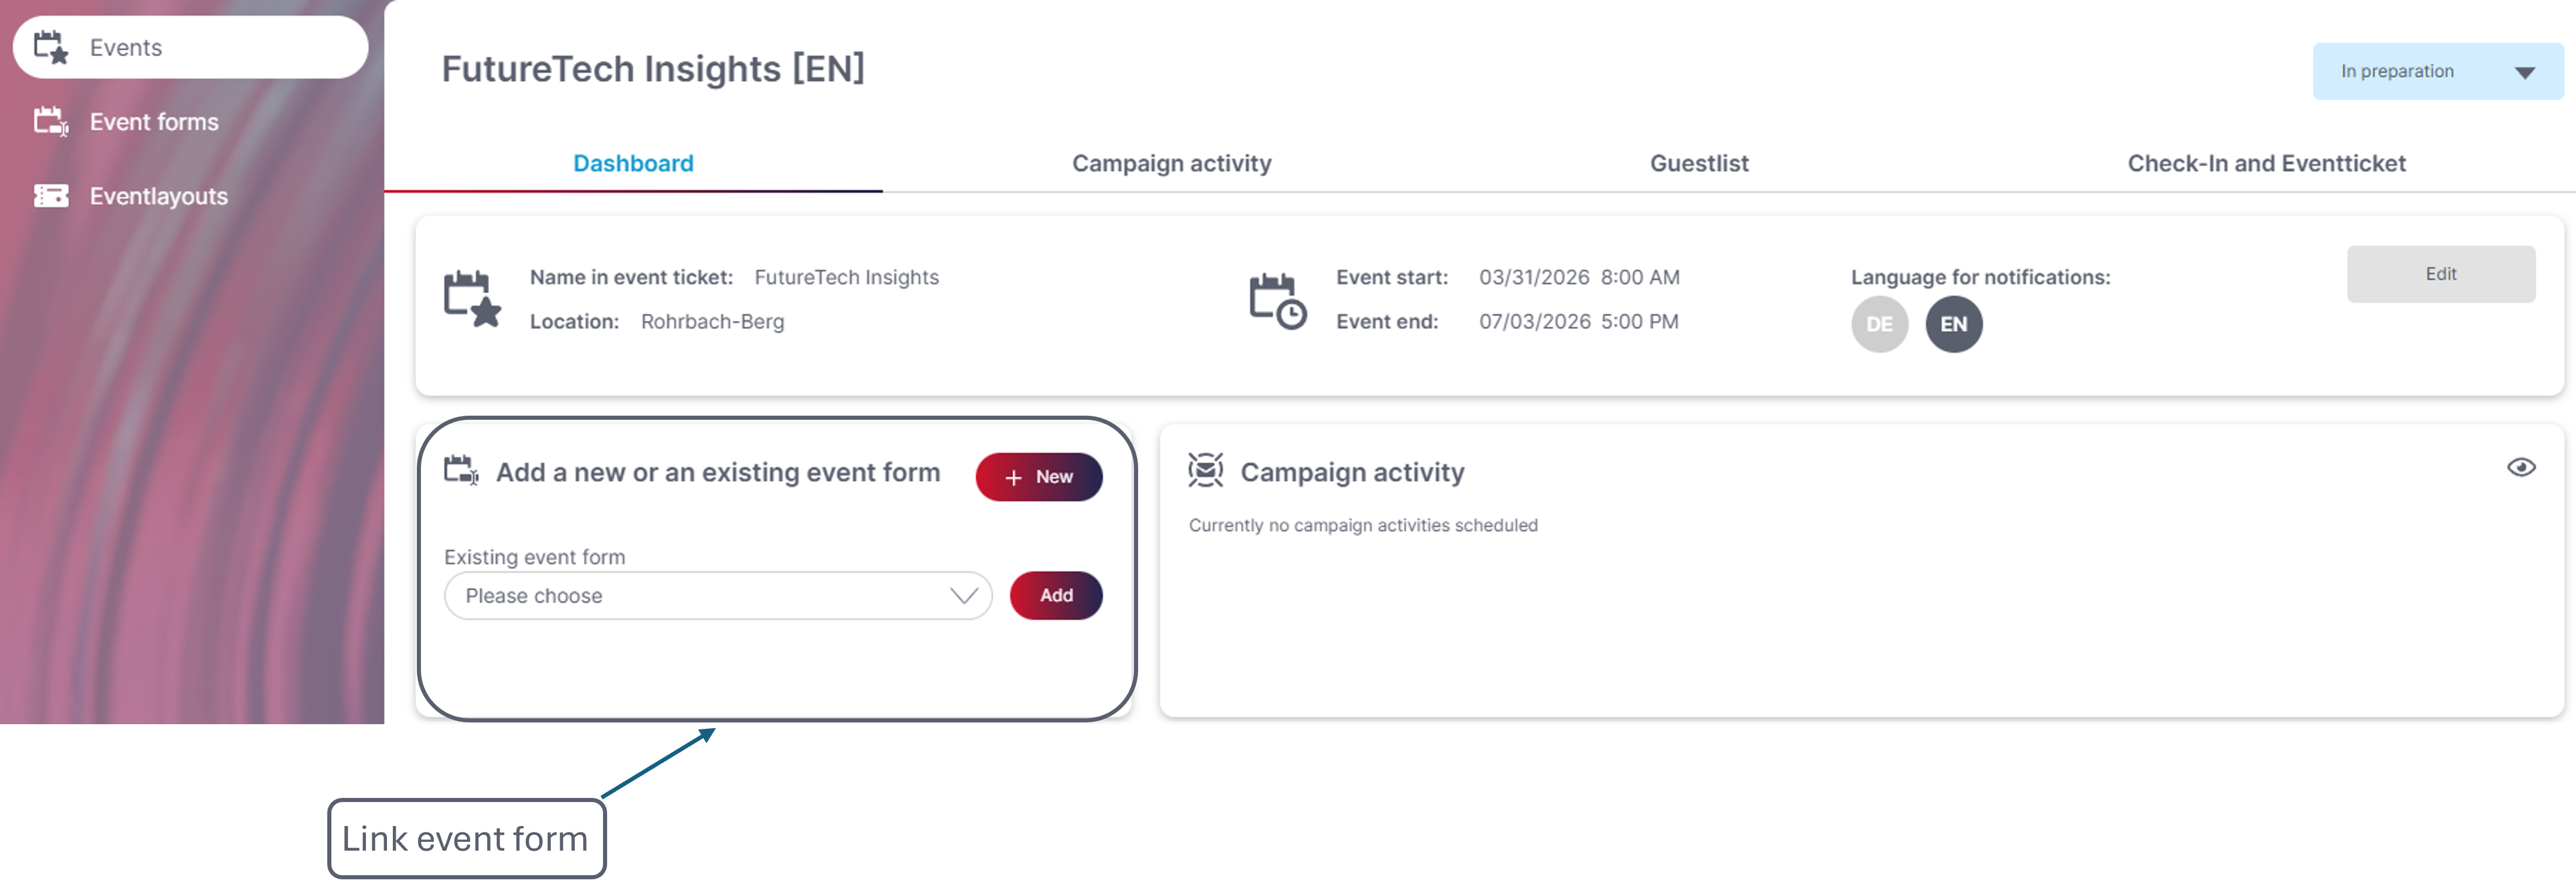
Link the event form to the event! (Event → Dashboard)
You can find out more about event forms here.
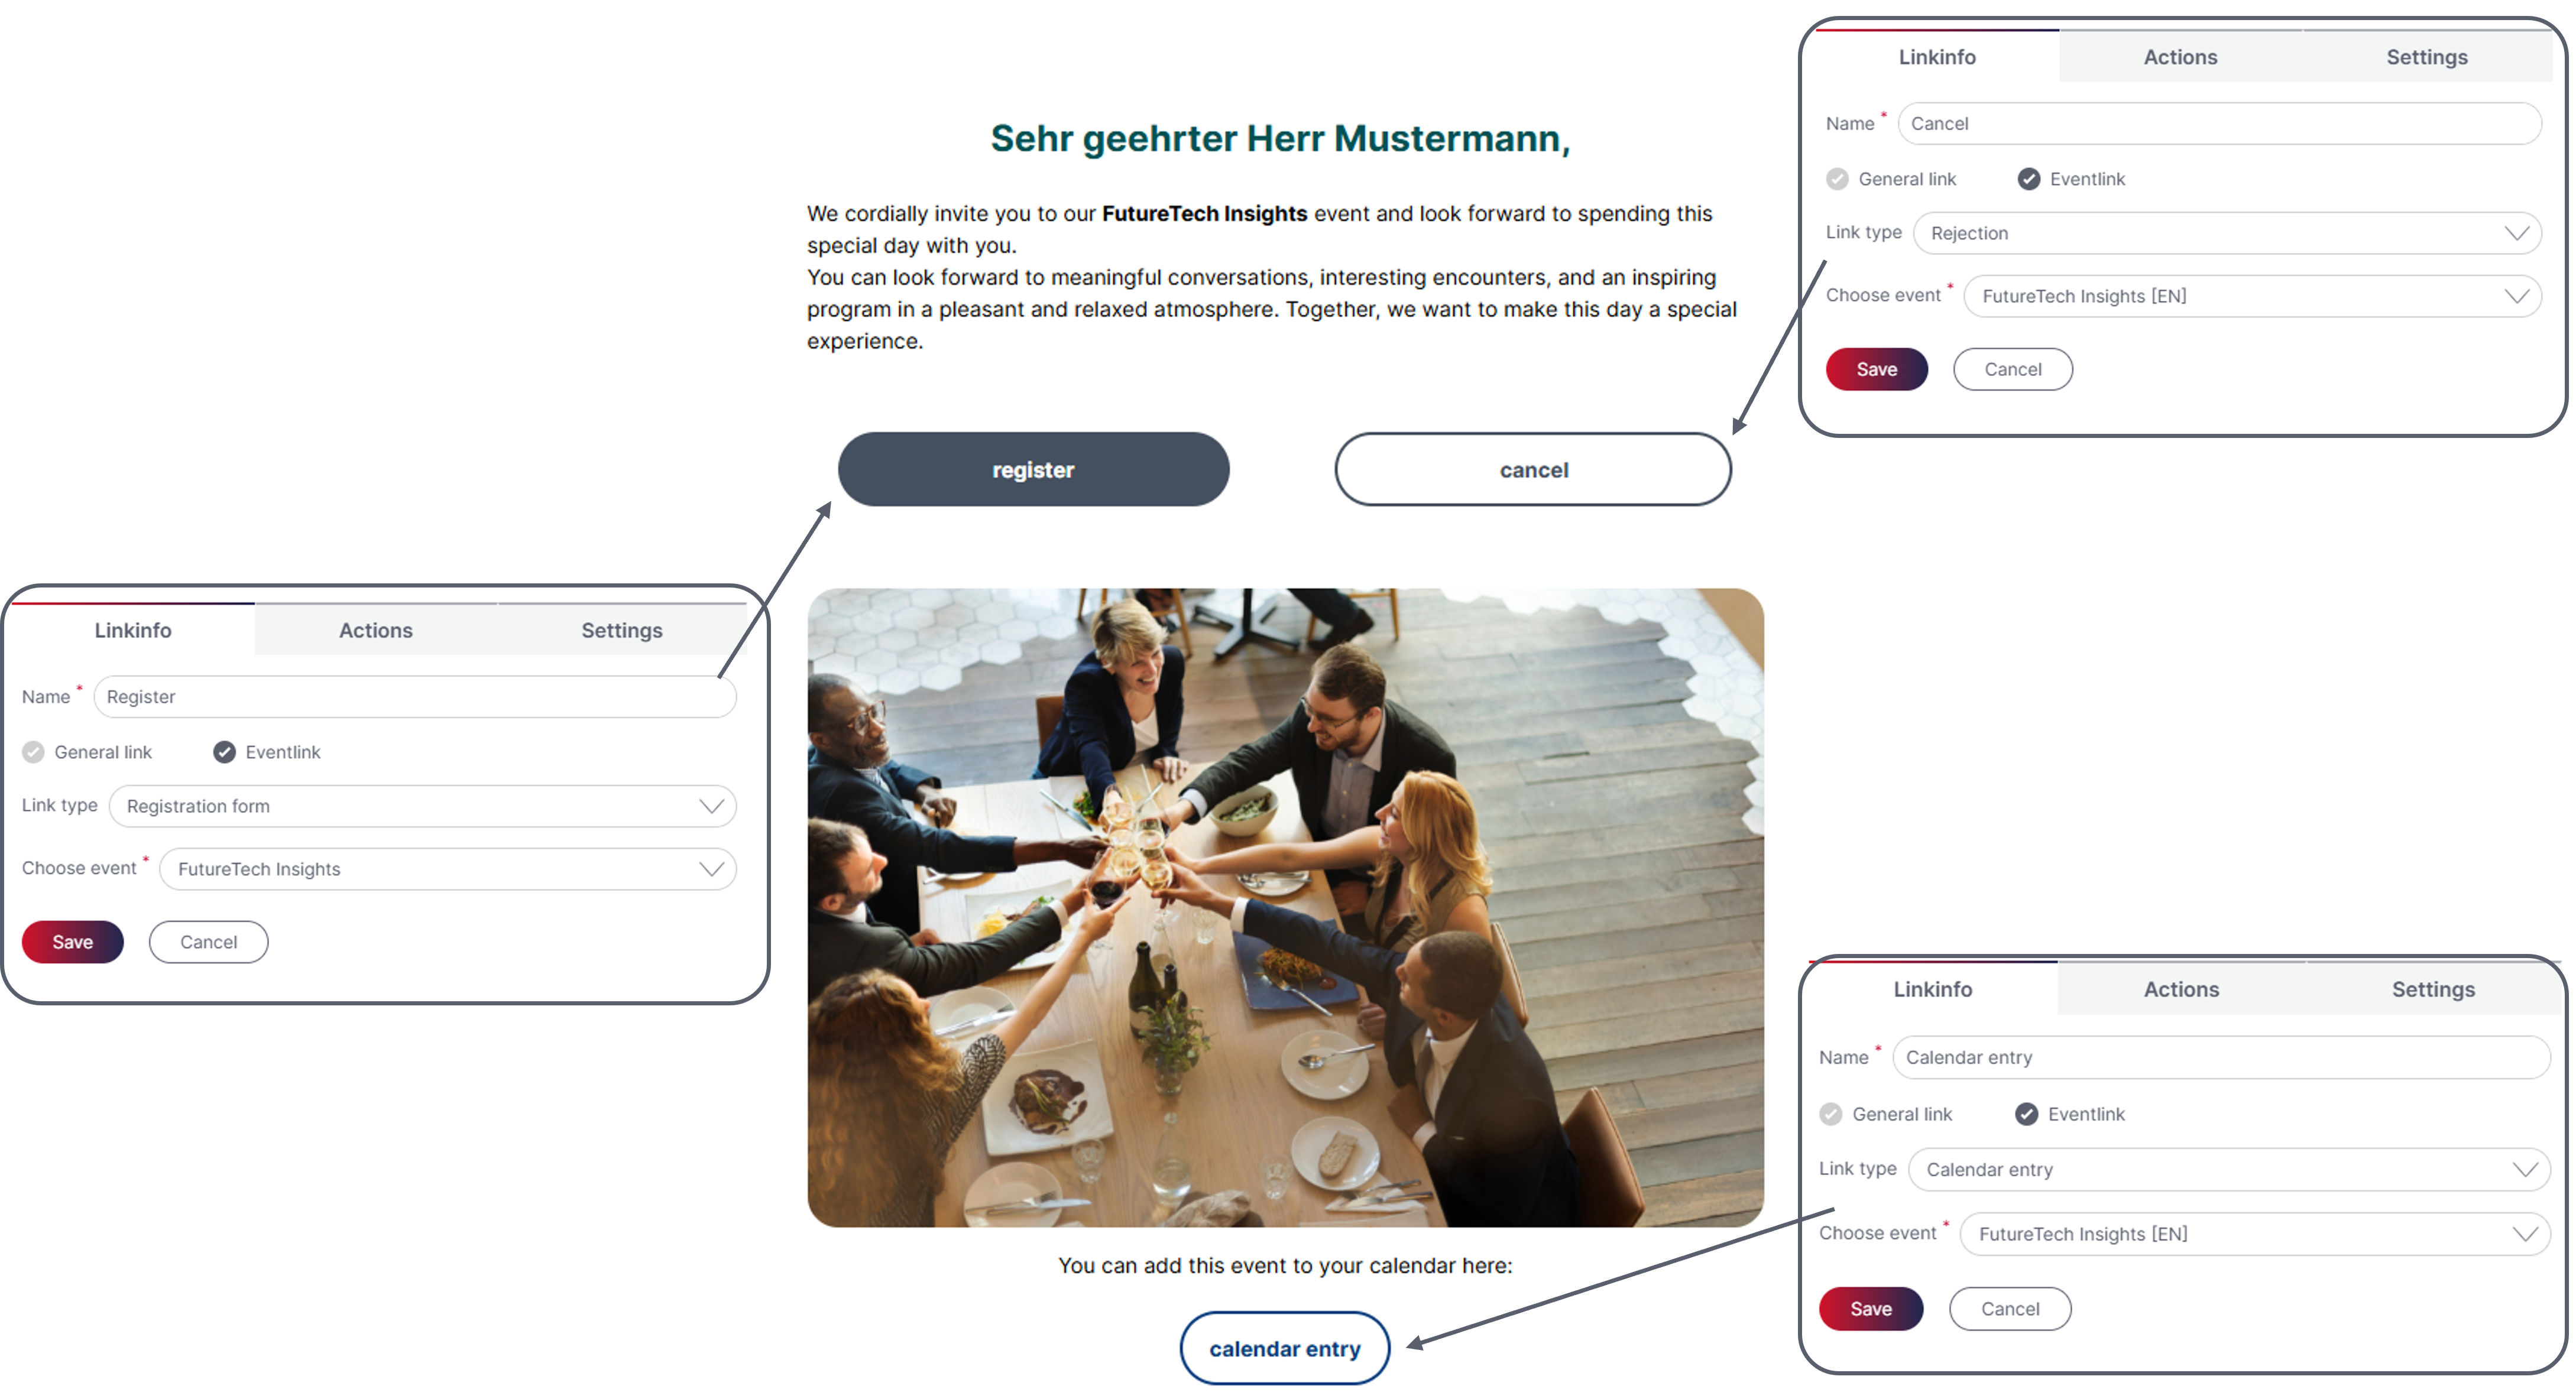
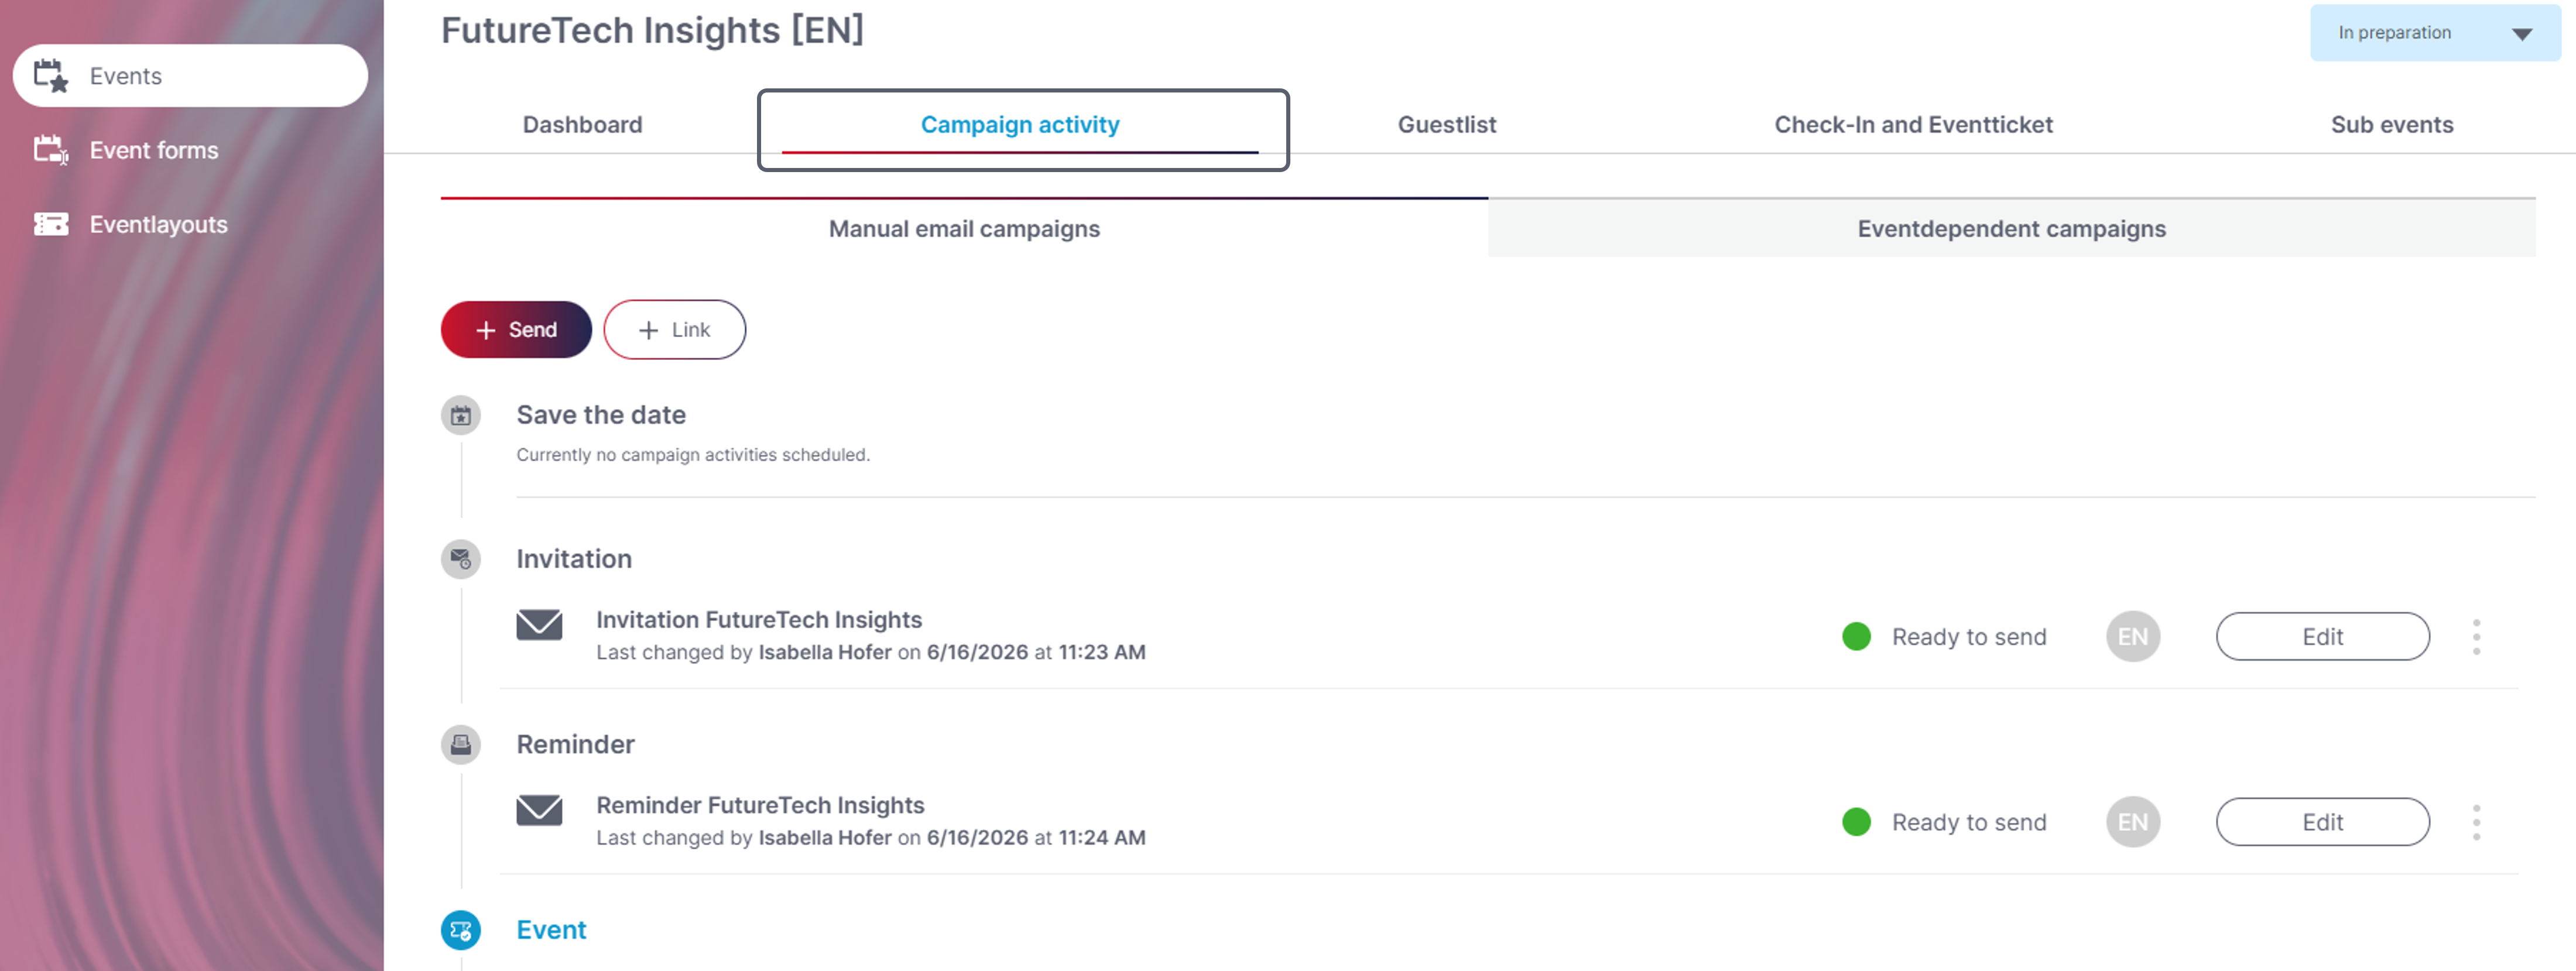
Step 3: Create an invitation campaign
-
Create a campaign with event information
-
Link to the registration form: Insert Eventlink with the link type ‘Registration’ and select the event
-
Insert event link rejection and calendar entry (optional)
-
Sent via Campaign activity (in the Event)
Step 4: Define the sending of the registration confirmation
-
Automatic confirmation
-
Create the ‘Registration Confirmation’ campaign (Send option: Event depending mailing, Status: Ready to send)
-
Enter this in the event form (under the ‘Action’ tab)
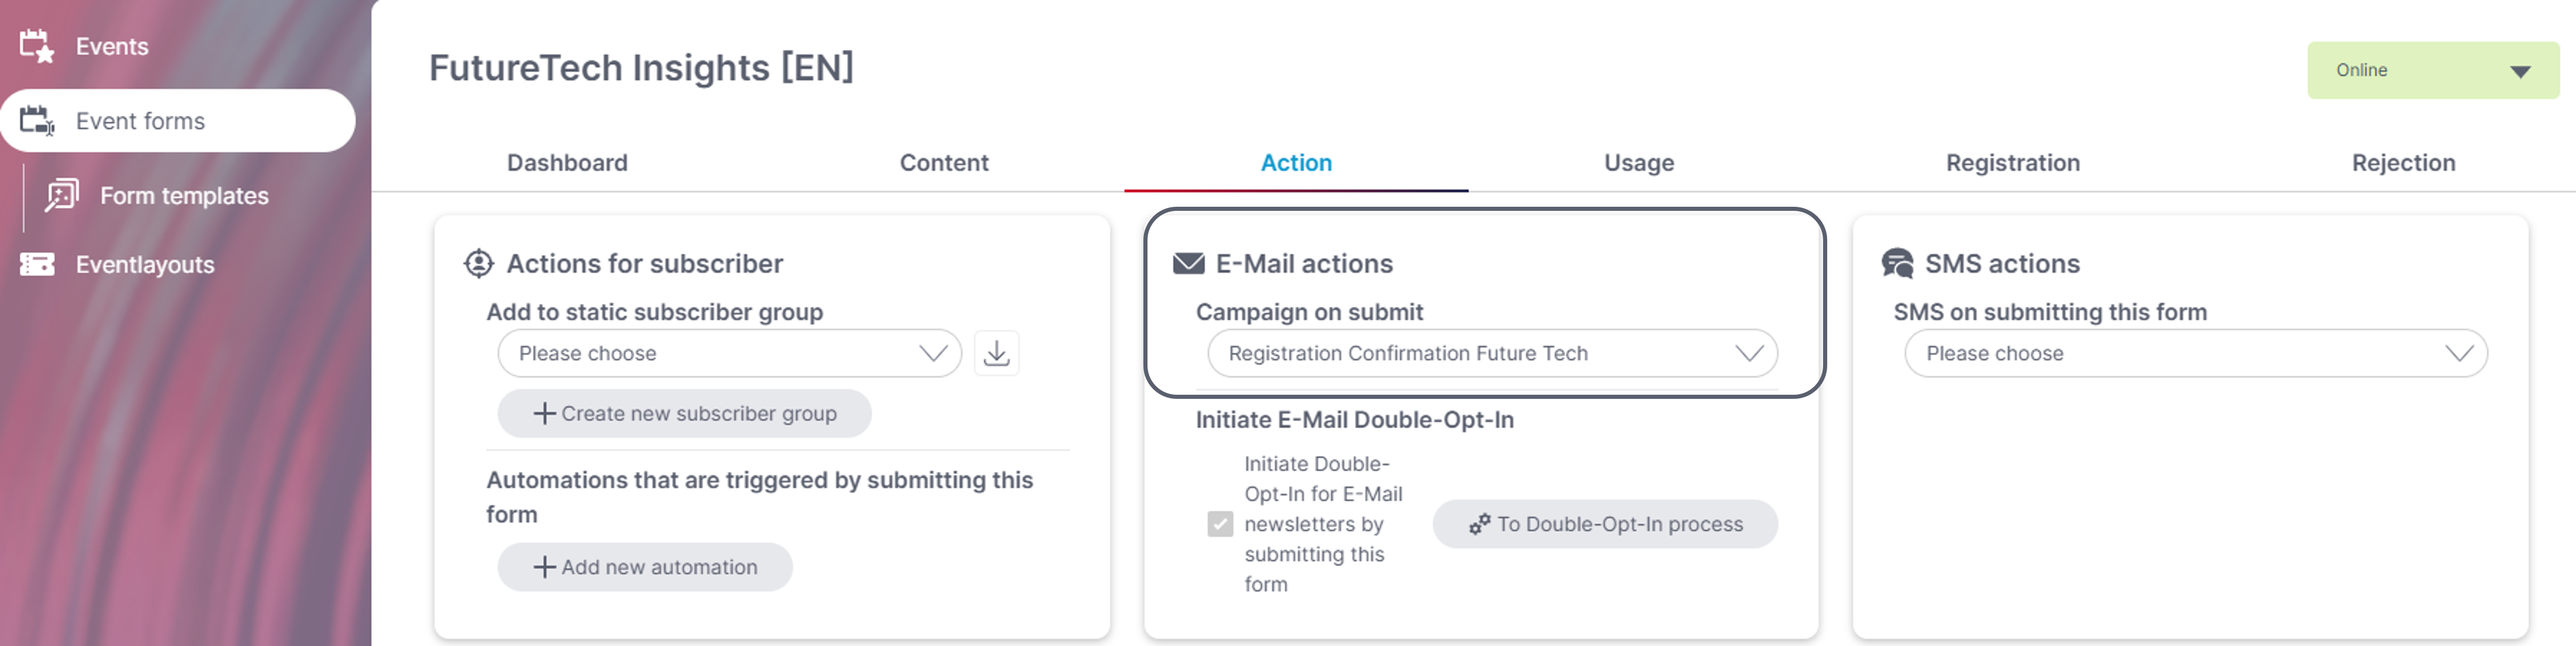
-
Or manual campaign dispatch
- e.g. reminders for registered participants
- Link via eventlink (Link type registration confirmation)
-
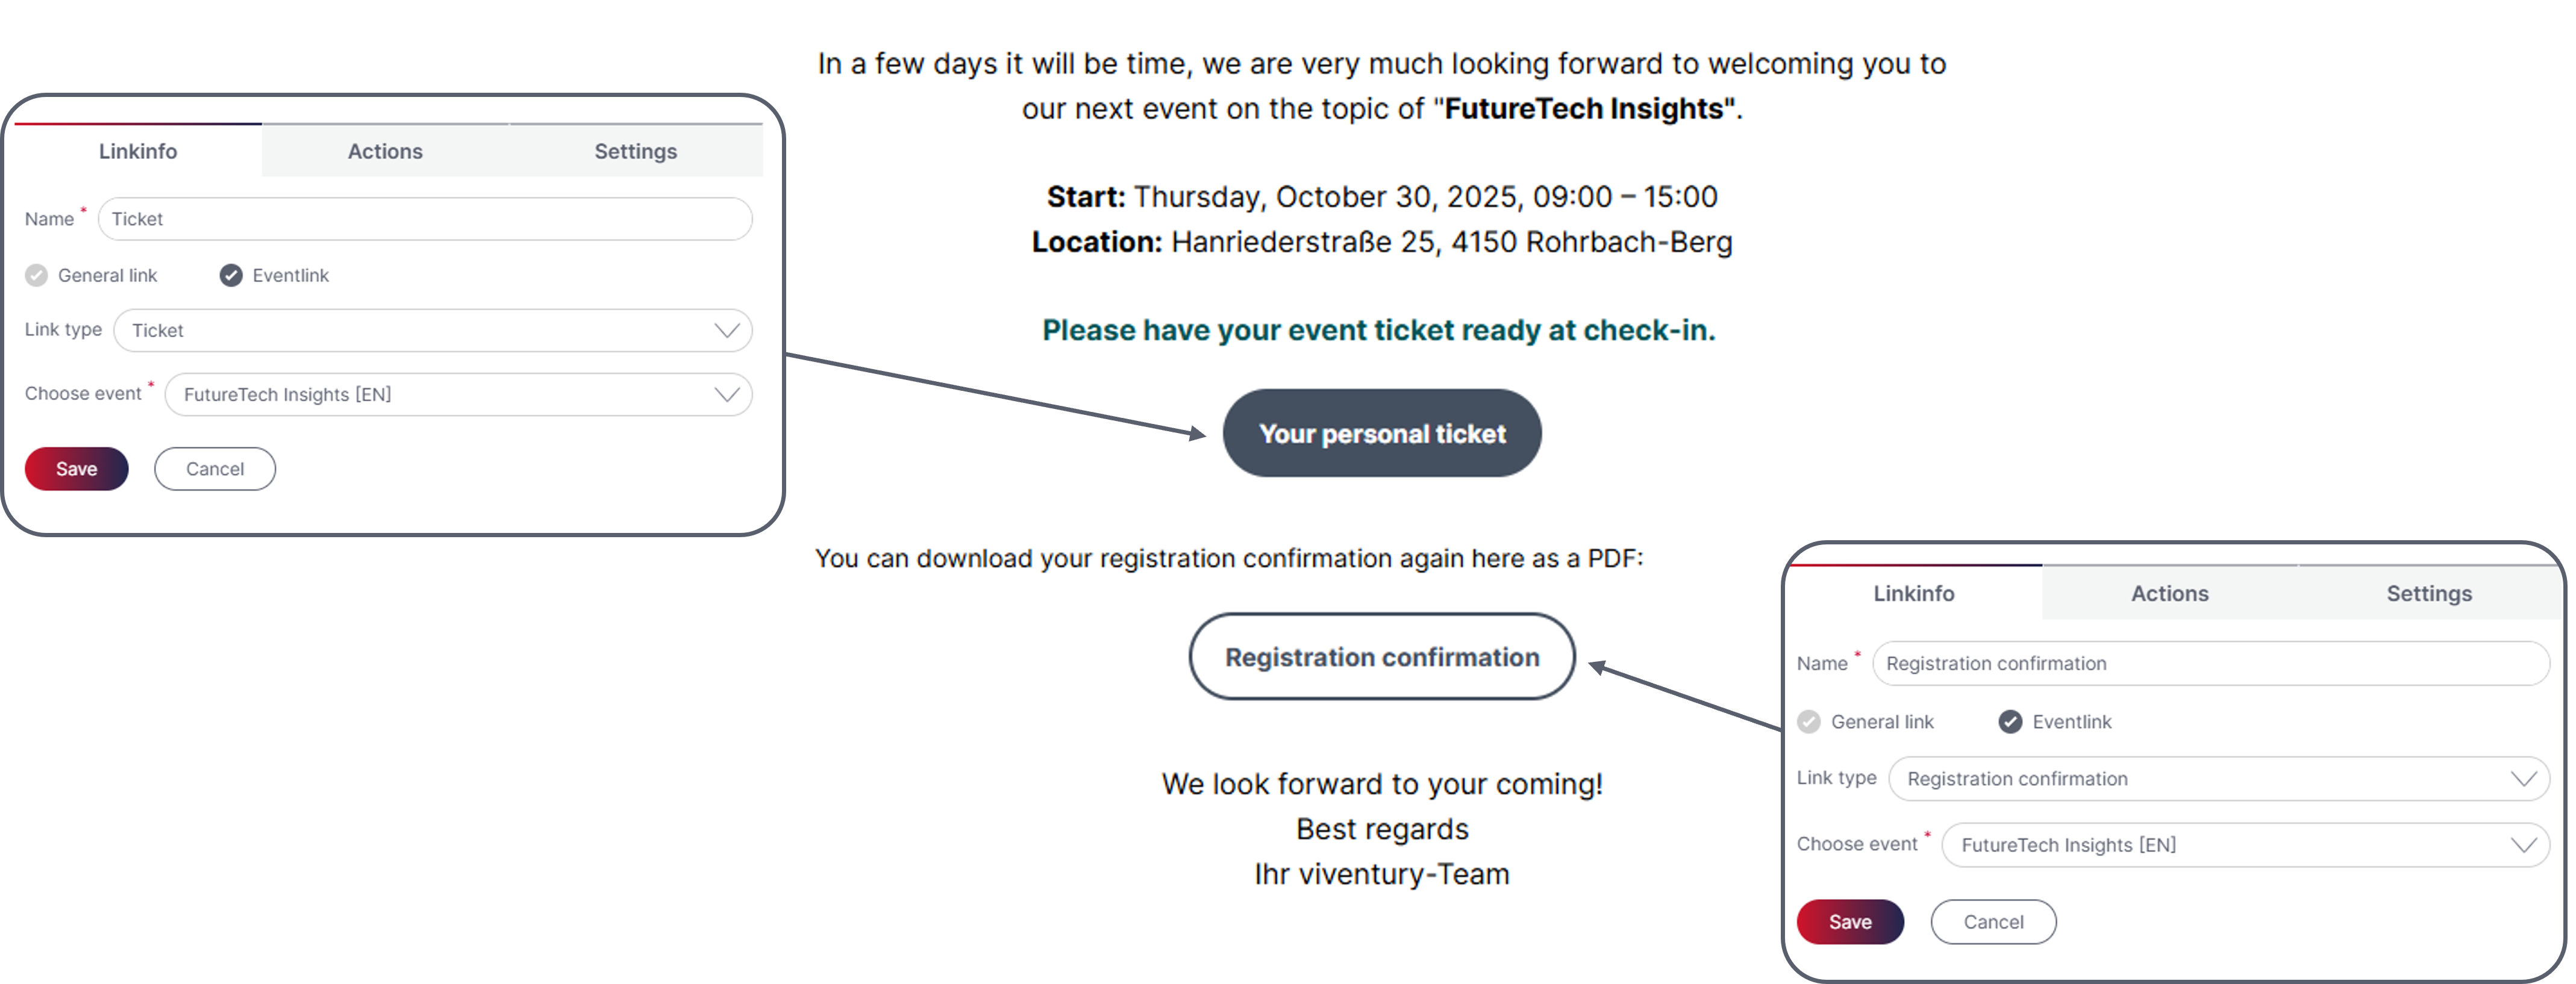
Step 5: Create more campaigns
- Reminder for registered users or subscribers who have not responded
- Link to ticket and confirmation of registration (event link)
- Send via campaign activity in the Event (pre-defined subscriber groups)
Step 6: Edit event layout and ticket
- Event layout: Set colours, images and format
- Event→Check-in and event ticket: Add fields
- Layout is linked to the event (general settings in the Event)
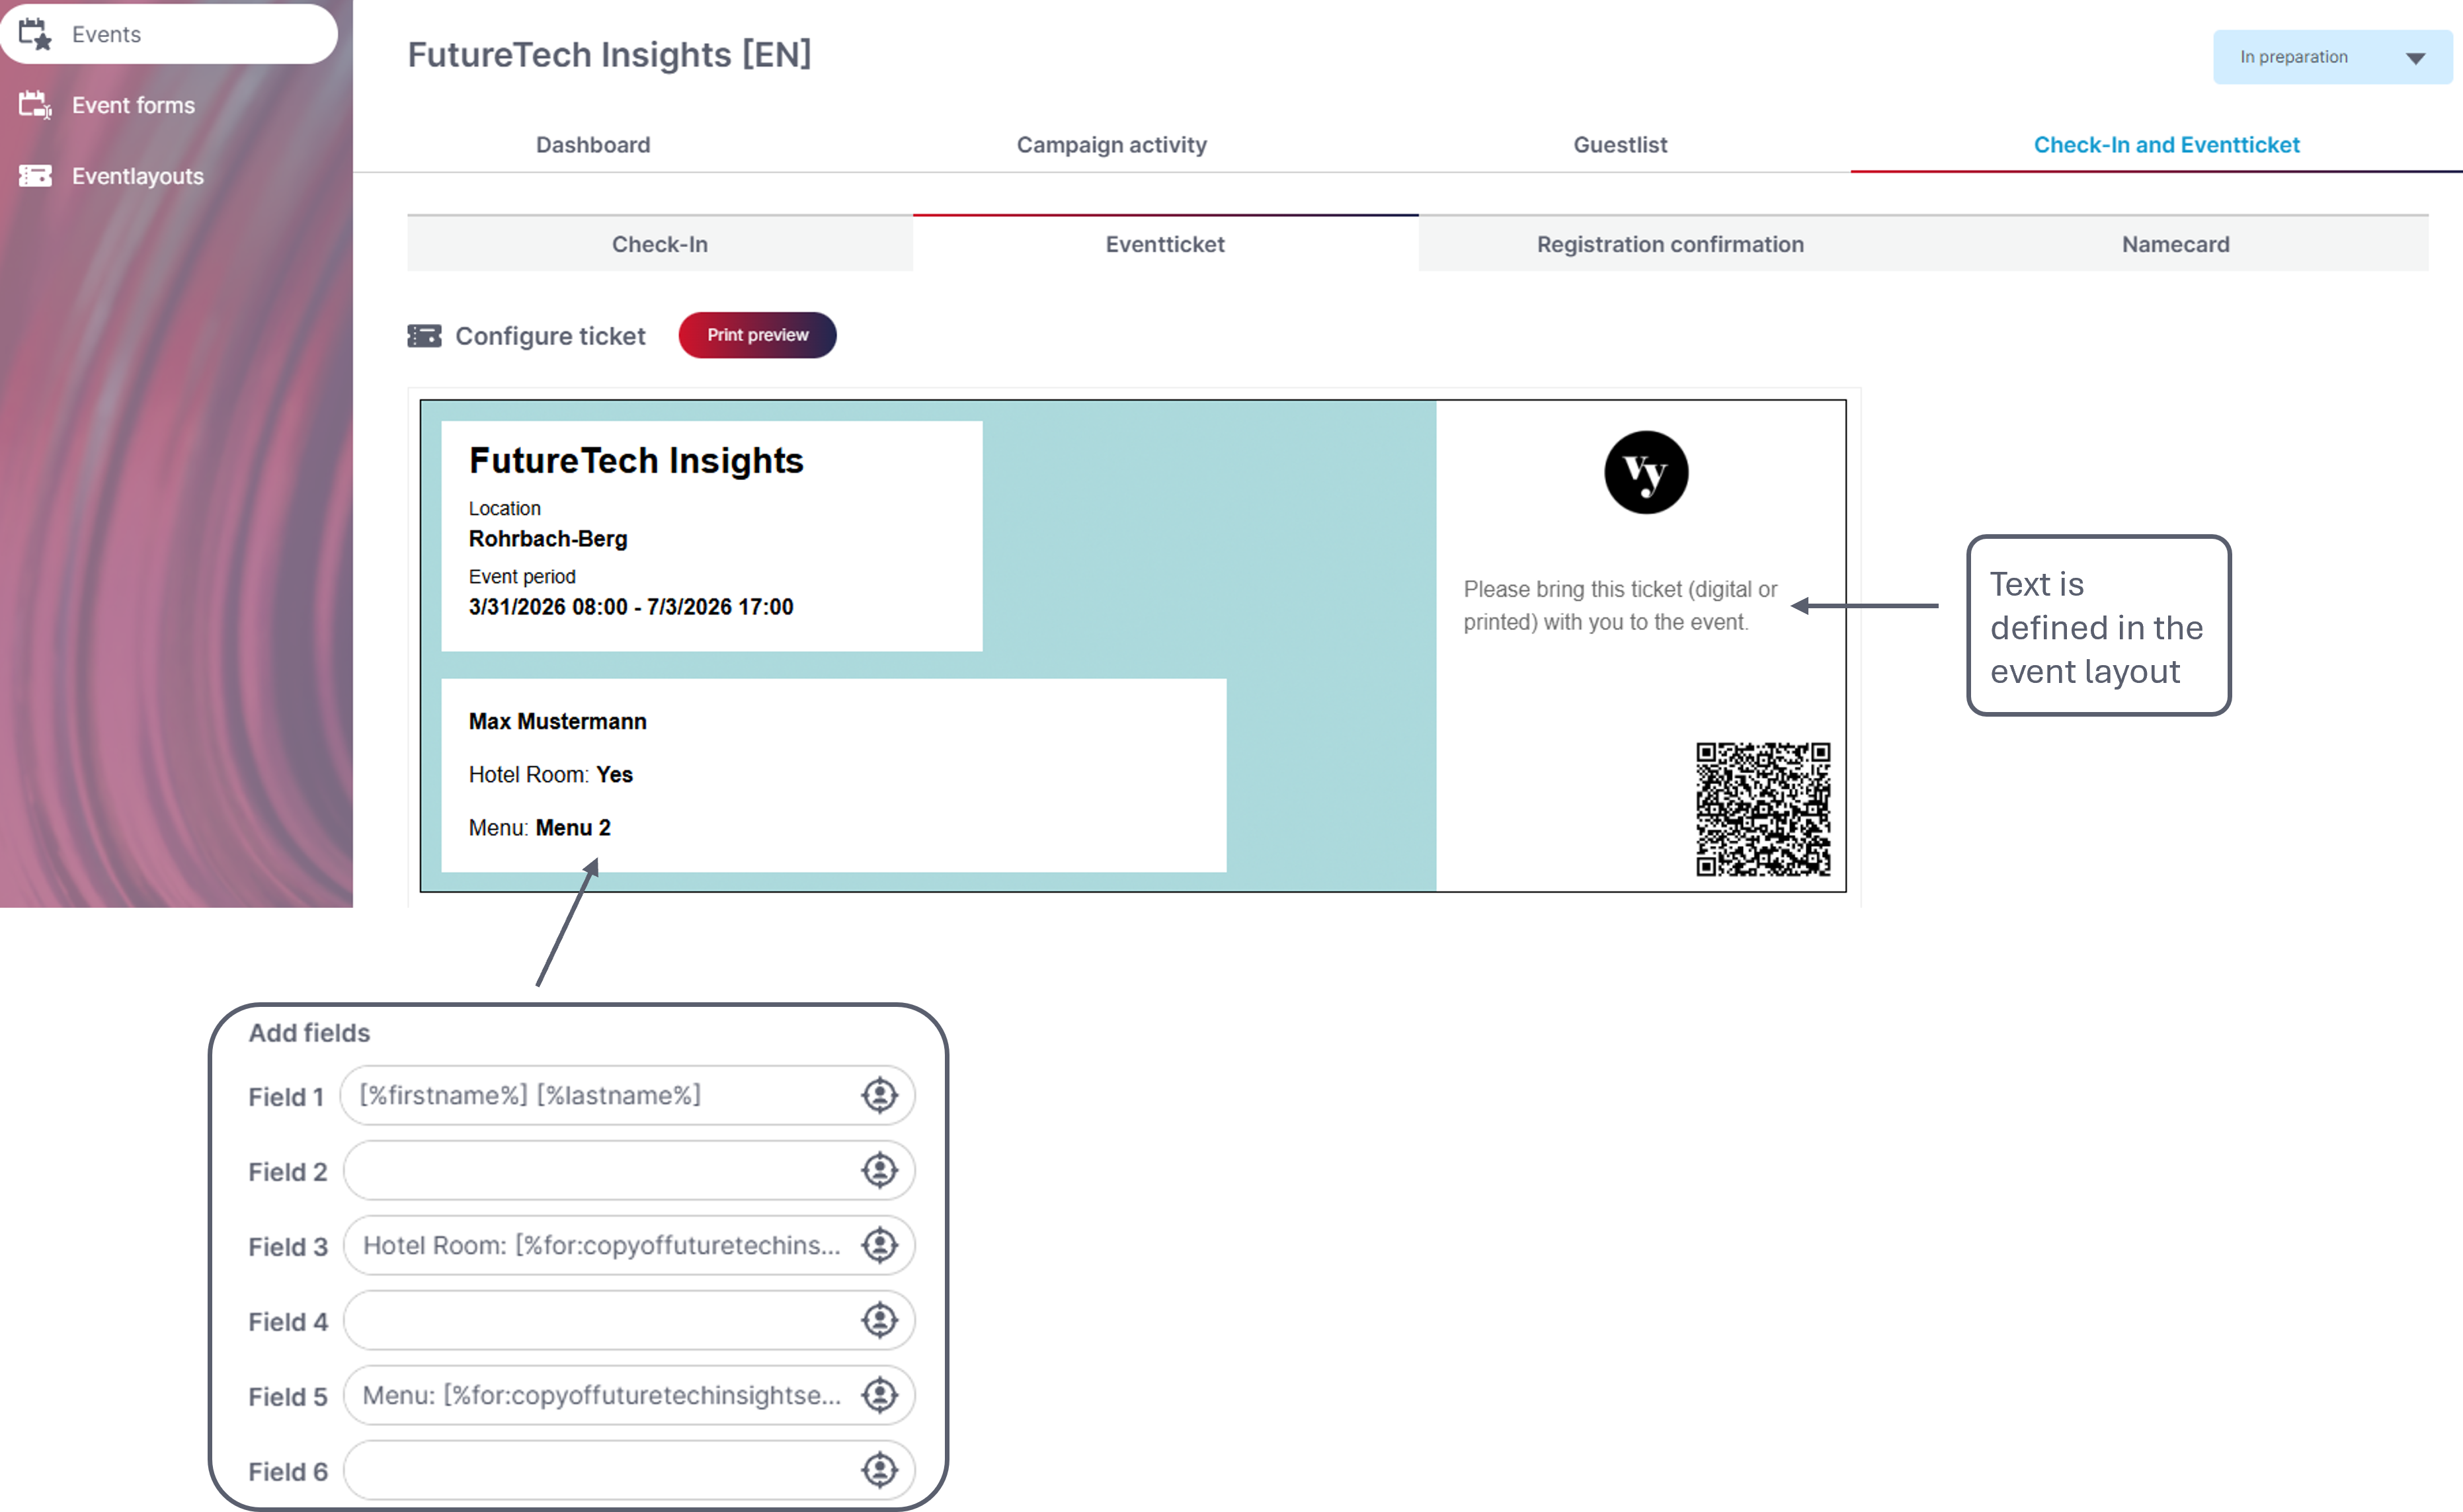
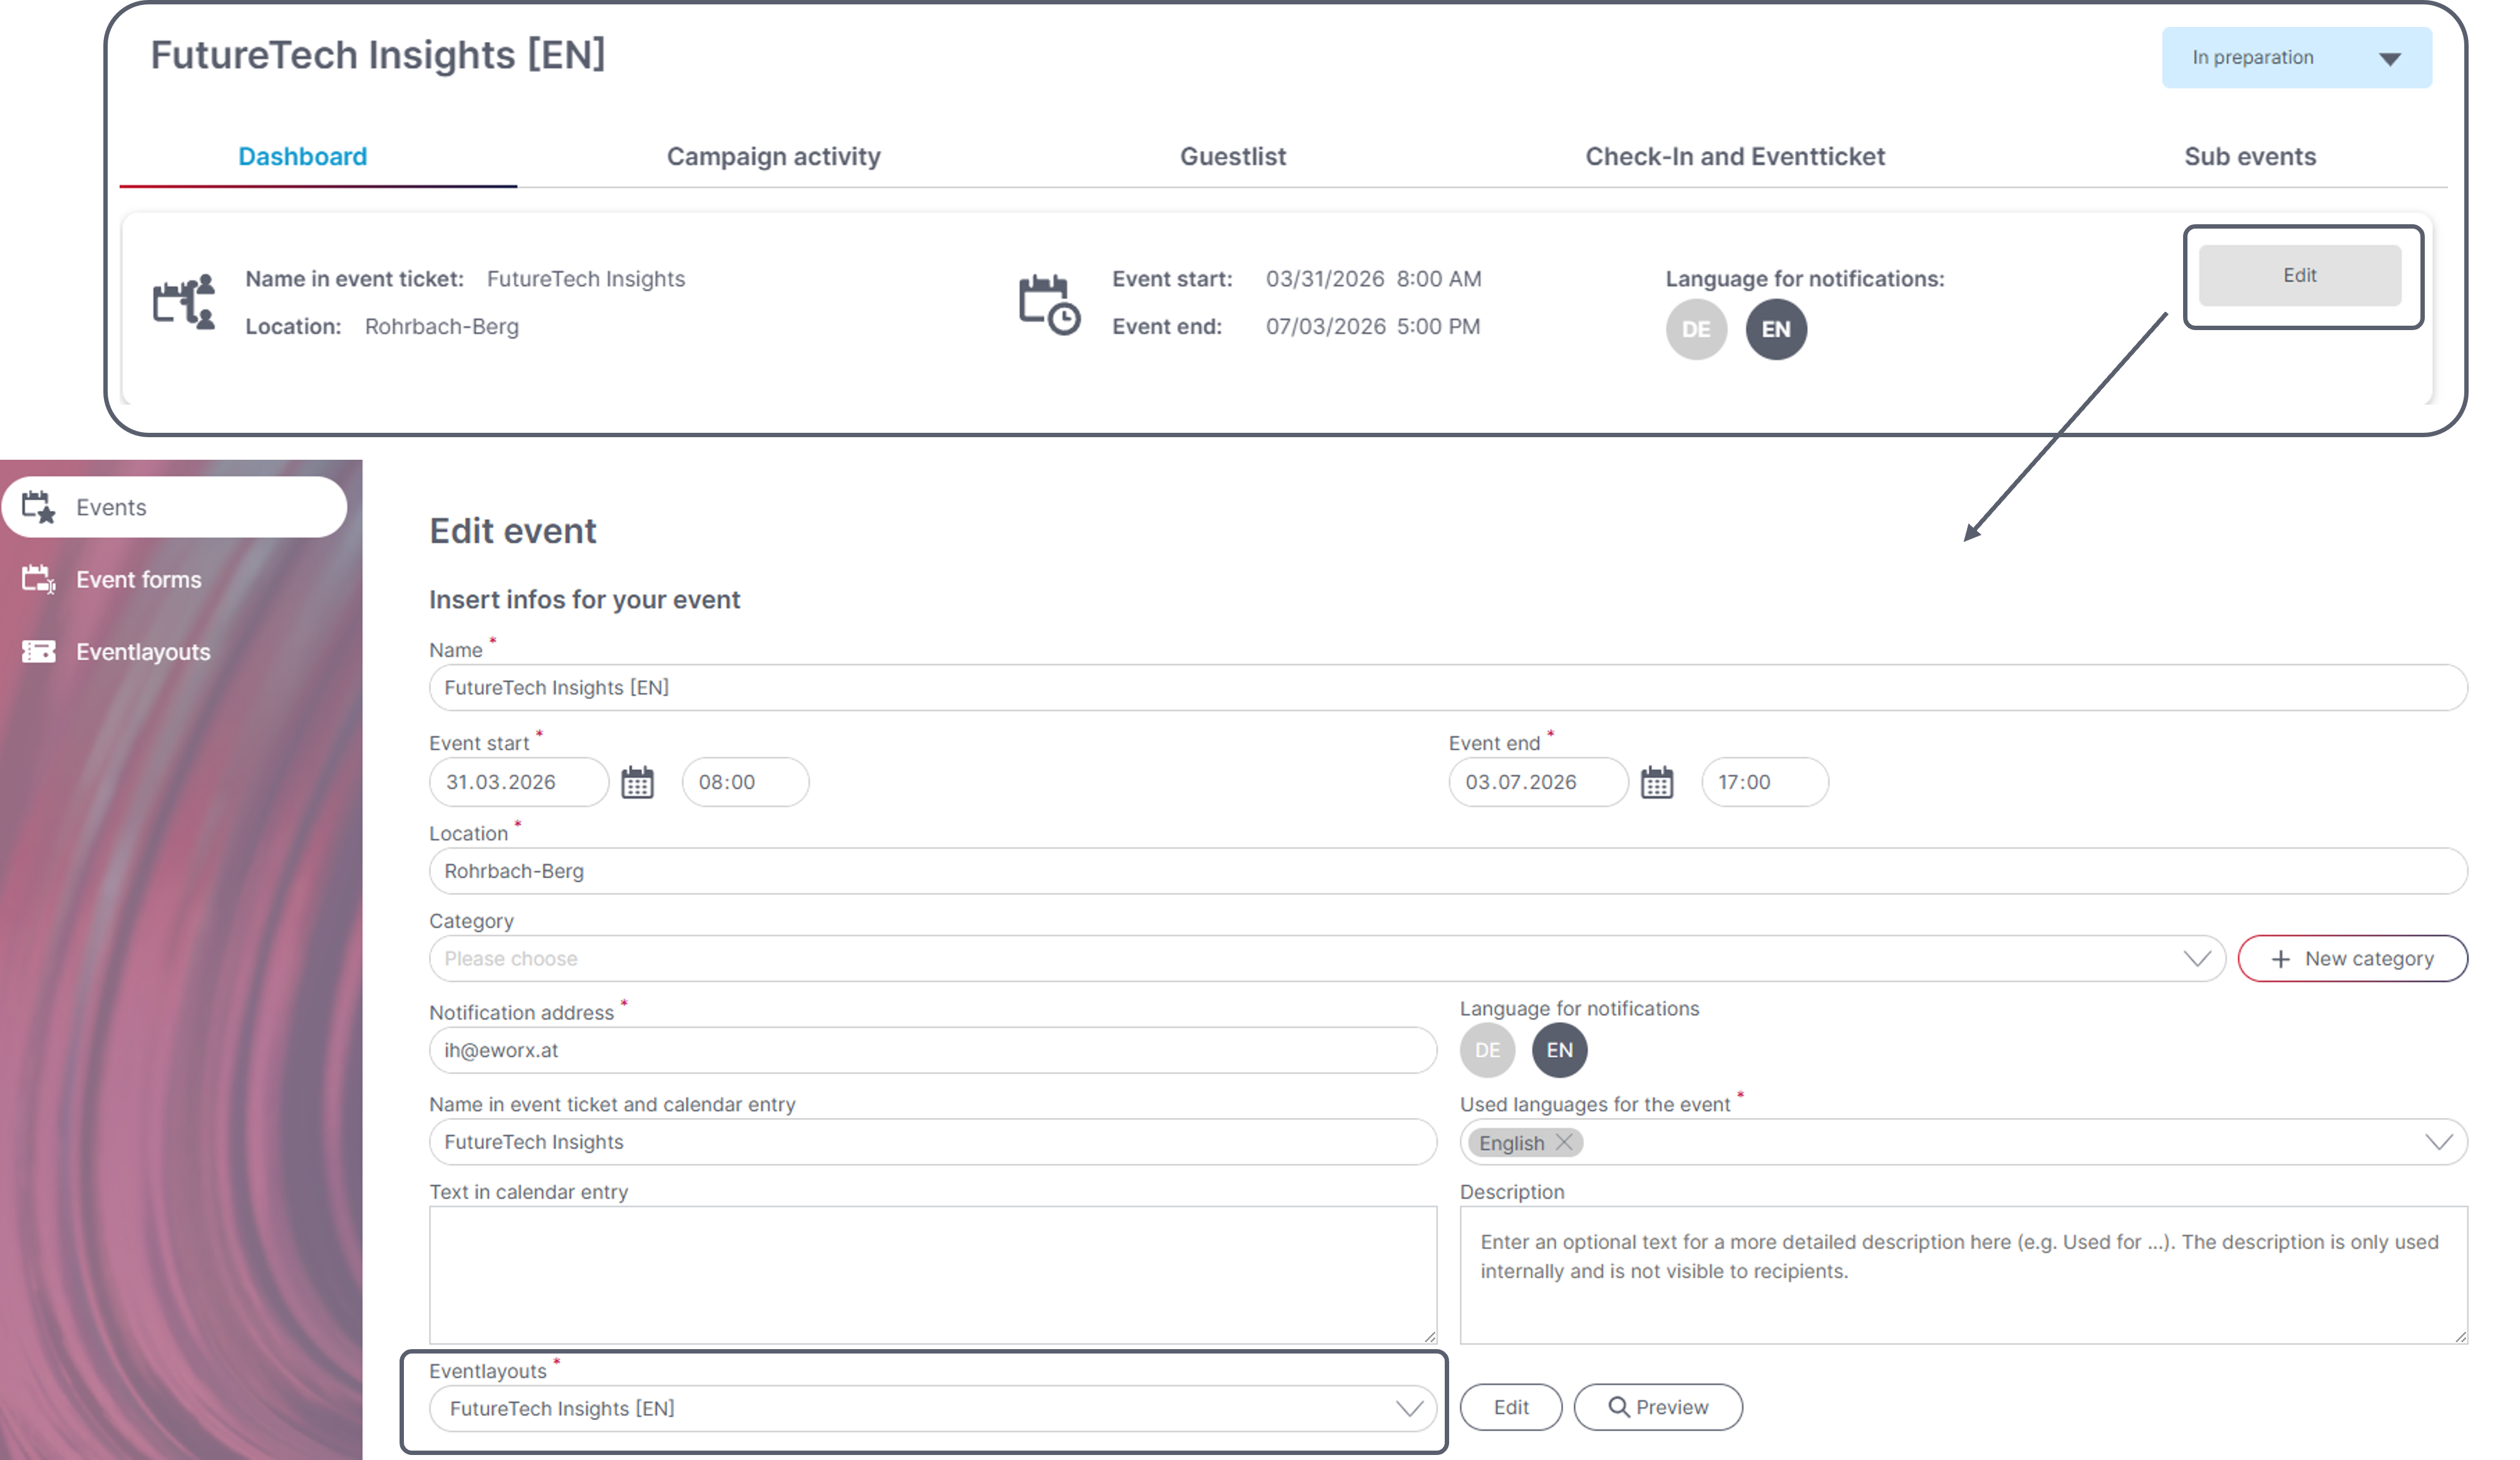
- The ticket is linked to the campaign and contains a QR code for check-in
Step 7: Send/schedule campaigns
- In the Event→Campaign Activity section, send campaigns as part of events
- Can be sent to predefined subscriber groups (invited subscribers who have not responded, registered users)
- Link campaigns that have already been sent
Step 8: Check-In
-
In the Event under ‘Check-in and Event Ticket’, open the check-in (scan the QR code or click the button; enter your PIN if required)

-
Check in participants:
- Scan your ticket using the QR code
- or select participants manually
You can find further information on organising and managing events in the following whitepaper.